Introduction
- Category: Blueprints
- Update: 3.0.4 (10.01.2025)
- Unreal Engine: 4.26 - 5.51
- Platforms: VR, PC, Console
Gallery
Executable demo
The executable demo is available for free on itch.io. Please try the demo before purchasing.
Features
- Realtime shallow water simulation – fluid data modifiers, wave generator, and extendable interface
- Fluid surface rendering – caustics, wetness, underwater, waterline, advected foam, advected waves, blending with the ocean, dynamic audio detection.
- Fluid Interaction – simple cheap ripple solver moving with character, optimized to an absolute minimum
- Ocean wave blending – rendering tillable ocean heightmap texture in a single pass
- Niagara environment interaction – High-quality effects, bouncy plants, character swimming, boats,
- Clean, efficient, GPU-friendly implementation, interface designed with the KISS (Keep It Simple, Stupid) rule in mind
- Tool for generating ultra-fast static meshes with flow maps baked into vertex color and uv.
- Advanced fluid state management and loading state in gameplay.
- Niagara fluid async readback system for sampling height and fluid flow in blueprints.
- Dynamic audio analyzer. The sound source is positioned based on fluid movement.
- Velocity-based fluid flow advection method for foam caustics and waves
- Possesable vehicle system implemented especially for boats
- Underwater glass and spline-based tunnels, lights, decals
- Coastline wave break rendering
- Replicated ocean waves and vehicle movement
- Simulation-driven surface particles (leaves and dust)
Limitations
With great power comes great responsibility. I am committed to being a reliable marketplace creator, so I must communicate the limitations and disadvantages of using simulations. The Fluid Flux system is somewhat overhyped, so please, before purchasing, read the description below and ensure that everything aligns with your expectations and requirements. Ensuring that is crucial for the Refund Policy
The system is advanced, so it may be overwhelming for beginners. The code is clean and elegant, but blueprint reading skills and example code analysis are required.
Shallow water simulation
- The Fluid Flux simulation is based on the Shallow Water Equations (SWE). It is calculated in 2D on a heightfield mesh, meaning all obstacles are rendered to a height using top-down projection. Fluid can not be simulated in caves. However, the algorithm can ignore particular objects, such as bridges, so they do not interfere with the simulation.
- While Fluid Flux represents a significant advancement for the game industry, it also introduces additional challenges. Controlling and adjusting simulations can be demanding; sometimes, a single parameter change can alter the fluid flow across an entire map.
- The simulation area can’t be rotated. The product supports only axis-aligned rectangular volume.
- The simulation area can’t be moved in runtime. Movable volume is one of the most important features for future updates.
- The simulation domain does not support the wave break effect because the fluid approximation does not contain the needed data to render it.
- Niagara fluid readback used for buoyancy and fluid detection returns results with (at least) one frame delay. It’s good enough for most features like swimming fluid detection but not 100% reliable. Trace hits with dynamic fluids are not supported now.
- Simulation is deterministic under certain conditions: the same machine and simulation parameters. Still, there are probably differences between floating-point operations on different GPUs, so it can’t work fully deterministic.
Known issues
- “Real-Time” render mode is required to simulate in the editor. Otherwise, the view will not refresh after each frame. Plants also will not load properly on the map if you are not in “Real-Time” render mode in the editor. Its limitation of blueprints: I don’t have any event that could be executed after loading and adjusting Niagara effects.
- Rendering underwater translucent mesh is a challenging problem to solve. Single-layer water materials do not support translucency, so translucents are invisible when watching surfaces from above water. The Fluid Flux mesh-based post-process material implementation is more functional because it can be overlayed before translucent meshes.
- Shadows on water may look a bit blocky. This is a limitation of the single-layer water material in Unreal. Epic improved it in version UE5.3, and it should look better.
You will have to enable Virtual ShadowMaps, and you will also add those lines to your DefaultEngine.ini:r.Water.SingleLayer.DepthPrepass=1
r.Water.SingleLayer.ShadersSupportVSMFiltering=1
r.Water.SingleLayer.VSMFiltering=1 - The maximum heightmap range is 32000 units. This limitation was introduced with Unreal Engine. The problem concerns rendering clamped colors to render targets for unexplained reasons.
- Single-layer water material mode is not supported on mobile. It’s an engine limitation that Epic Games should solve. Generally, this material mode does not support the absorption coefficient on mobile, so water will look differently.
- Path tracing is not supported because Single Layer Water mode does not work.
- The PS5/Xbox shader compiler defaults to 16bits float per channel, which means you will have to lower the precession settings in the simulation domain to make it work on console platforms. Unfortunately, this change may cause water loss, as 16bit is not precise enough to simulate conservative water flow in the long term. Please pay attention when your gameplay depends on simulation results.
- Statically generated mesh of water can be inconsistent with waterline post-process. This issue will be addressed in the future.
- The underwater post-process effects in VR mode only work when Project Settings > VR > (enable) Instanced Stereo = false. This rendering mode breaks rendering the translucent meshes and should be disabled.
Scalability
The simulation domain requires allocating floating-point render targets and updating every frame, which may cost a lot.
The size of domains can be increased by changing the precision of details per simulation cell. Ocean setup does not require allocating memory, but rendering water is limited by floating-point calculations. You may encourage many unpredictable behaviors like disappearing post-process and surface far from the center of the map; 20 km in every axis is the limit.
| Domain | Resolution |
Precision |
Maximum domain size |
| Simulation | up to 1024 x 1024 | up to 100 cm per pixel | 1km x 1km |
| Coastline (island) | up to 2048 x 2048 | up to 1000 cm per pixel | 20 km x 20 km (pixel size 500 cm) |
| Ocean | n/a | n/a | 40 km x 40 km (limit of floating point) |
Performance
Many users are concerned about performance and don’t know if it requires a high-spec PC. Performance depends on the GPU, rendered resolution, and enabled engine options, but the product is prepared even for older devices and can be adjusted for more demanding projects.
I heavily recommend downloading the demo and testing it on the target device. Example results of my tests are presented below:
| GPU | Resolution | River map | Island map |
| RTX 3080 | 2560×1440 | 320-380 FPS | 260-310 FPS |
| RTX 2080 | 2560×1440 | 160-200 FPS | 110-160 FPS |
| GTX 860M in 8 years old notebook Lenovo Y50 | 1920×1080 | 25-30 FPS | 20-25 FPS |
In the case of bigger maps, efficiency may sometimes be a problem. I recommend avoiding the use of simulation resolutions larger than 1024×1024 in games. The calculation of a large-scale simulation often requires a substantial number of computations. I suggest utilizing the lowest feasible resolution for the simulation. For example, the maximum resolution in the example demos I provide is 1024×256 (BeachMap). The simulation frame can be baked into data assets and rendered without the additional cost of updating the simulation, which is incredibly efficient and valuable for rivers. You can also lower memory consumption by additional compression.
Multiplayer
Fluid Flux is not inherently designed for multiplayer environments. However, under specific conditions and certain limitations, it can be utilized in multiplayer scenarios as a visual addition through carefully crafted gameplay design. This chapter outlines the challenges, technical limitations, and potential workarounds developers should consider when integrating Fluid Flux into multiplayer games.
The table below presents the current status of multiplayer support inside different domain types.
| Domain type | Status | Description |
| Ocean | Replicated | The server sends the wave time and wind settings to the clients. |
| Coastline | Client-side | Coastline time replication has not been implemented yet. |
| Simulation (dynamic) | Client-side | It can easily desynchronize between the client and the server. The wave generator uses render time, so it is not yet deterministic. |
| Simulation state | Works | The state is the same for the client and server. It does not require any replication. |
Technical Limitations
-
Client-Side Simulation: Fluid Flux uses Niagara readback to sample water data, which is essential for GPU computations. However, Niagara does not function on dedicated servers, making it impossible to process critical data from the server side. Simulations are calculated client-side only, and the results of Niagara Readback are automatically sent to the server. This approach is unsafe for games that rely on an authoritative server, which can be problematic for competitive gameplay.
-
Bandwidth Constraints: The simulation involves substantial dynamic data changes, which are challenging to synchronize over a network due to limited bandwidth. Transmitting large amounts of fluid data in real-time is impractical for most multiplayer setups. Simulations can quickly desynchronize without mechanisms to correct discrepancies between the server and clients, leading to inconsistent results across players.
-
Non-Deterministic Behavior Across GPUs: While the simulation is deterministic on the same machine under controlled conditions, floating-point operation differences across GPUs can result in minor discrepancies, complicating synchronization.
-
State Recovery Issues: Synchronizing the simulation’s state is particularly challenging when new players join, or frame spikes occur. The system cannot smoothly recover from these situations, even with limits on accumulated iterations per frame. In situations like this, storing prebaked states of simulation could be loaded after the player joins the game is recommended. For example, the state of water that the client should load when the dam is broken.
-
Vehicle Replication: The demo maps include a drivable board system that works in multiplayer. However, client-side movement lacks smoothness and would require external plugins to improve the physics replication of actors. Unreal Engine 5.5 introduces features like the “mover” and enhanced physics replication for multiplayer games, which will be utilized in future versions of Fluid Flux.
Fluid Flux’s multiplayer capabilities are experimental and come with notable limitations. It’s not recommended in competitive gameplay. Developers should weigh these limitations carefully and design gameplay around them to ensure a stable and enjoyable experience for players.
Open-world
The accurate open-world setup has not been tested. The demo examples show how the system can be used. I can’t promise anything more at this point of development. Just assume that you get what you see in my videos, no more, no less.
Voxel Plugin
Yes, you can use Fluid Flux with Voxel Plugin, but it is also limited to heightfield projection, so caves and planets are unsupported.
Use Simulation.RuntimeCaptureDelay = 1.0 to force simulation to wait for the voxel plugin map to generate mesh before rendering it to the height map.
The heightmap in this presentation is updated every frame using CaptureGroundHeightmap. It is inefficient and should probably be optimized only to update the area around the brush when something changes on the map. The UpdateGroundMap(Position, Size) function would be a better choice.
Good and bad practices
- Avoid using a large simulation resolution because you will quickly run out of memory; 1024×1024 seems like a good compromise.
- Don’t make your gameplay rely on fluid simulation in multiplayer because it can’t be synchronized.
- Avoid using Fluid Flux on flat surfaces; subtle slopes are always better.
- Avoid hard-edged geometry (boxes). It can be approximated wrongly in height maps, and steep slopes sometimes look terrible.
- Try not to overestimate this system. If I haven’t prepared the ocean with ships and a vast island covered by rivers and simulated lakes, there is probably a reason for that.
- Try not to update the simulation ground in every frame. It may cost you a lot of performance.
- Meshes using the materials with “PixelDepthOffset” active may not render appropriately into a ground height map. A simple workaround is described in the chapter Ground Capture->Solving issues.
Questions & Answers
- How it works?
The Fluid Flux simulation implementation is based on the Shallow Water Equations (SWE) solver. The algorithm was published by Matthias Müller in “Real-time Simulation of Large Bodies of Water with Small Scale Details”. Simulation is calculated on heightfield mesh, meaning all obstacles are rendered to heightmap using top-down projection. Fluid flows in X and Y directions between cells of the grid that describes the volume of water. Forces that move fluid are calculated based on the difference in ground + water height in neighboring cells. The coastline system uses the signed distance field to describe the edge intersection of water with the ground and renders animated wave profiles based on wave movement. - Can I use Fluid Flux in my game if I purchase it?
Take a look into the general unreal marketplace license. You can use it in your projects/games and release it in-store. However, you are not allowed to publish/sell the product’s source code. If the Unreal Engine licensing model does not fit you, contact support so we can create a custom license to match your unique and specific requirements. - Why is the price so high? Can you offer any promotions or discounts?
- Creating a Fluid Flux required over three years of research and development. Typically, a system of this nature would cost the company at least 350,000 USD. The current price makes it a significant time and cost-saving solution for everyone.
- This kind of system requires a lot of support, especially with ongoing engine updates. Since I have other products on my marketplace profile, my time is currently limited. I have already quit my regular job to focus entirely on developing and improving products.
- The asset combines several significant features designed to work together, making your development process more accessible seamlessly. You no longer need to purchase multiple separate products and spend time integrating them. It includes a ripple solver simulation, shallow water fluid simulation, water surface rendering, ocean wave generator, buoyancy support, waterline effects, post-processing capabilities, coastline rendering, and even support for Niagara particles. I have handled all these aspects, so you don’t have to worry about them.
- Please check my marketplace profile to confirm that I am a trustworthy creator with hundreds of positive reviews. The price of my products is always determined based on the work and time required to develop them. Eventually, you will realize that time is a genuine currency with significant value.
- There will be a promotional sale, but first, I must feel ready to support more customers. If you are not in a rush, add my product to the wishlist and wait patiently. If you want to be notified a few days earlier about a promotional sale, join my Discord server.
- I am not forcing anyone to buy my product. There are alternatives like Niagara Fluids and Water Plugin. You can try them for free and compare the results with my demo. Maybe you don’t even need the Fluid Flux. Choose wisely.
- External packs integrations ALS/UDS/Fluid Ninja
I plan to work on some integrations in the future. If you have a specific pack in mind, let me know. - Can I use it with Voxel Plugin?
Yes, you can use Fluid Flux with Voxel Plugin, but it is also limited to heightfield projection, so caves and planets are unsupported.
Use Simulation.RuntimeCaptureDelay = 1.0 to force simulation to wait for the voxel plugin map to generate mesh before rendering it to the height map.
The heightmap in this presentation is updated every frame using CaptureGroundHeightmap. It is inefficient and should probably be optimized only to update the area around the brush when something changes on the map. The UpdateGroundMap(Position, Size) function would be a better choice. - What about VR and mobile?
I currently do not support VR devices and mobiles.
Dynamic fluid simulations with high precision can’t be calculated on mobile, so only baked meshes/states can be used on this platform. I am planning to add VR and mobile support in future updates. The pack will receive a cheap surface material mode similar to the solution presented in Aquatic Surface. One user notified me that my demo maps are working without issues on Oculus Quest 2, but I have not tested it yet, so I can’t confirm it. - How to add swimming to ALS? Can you show me?
This task heavily depends on the character implementation, so I can’t provide an implementation for ALS. The Fluid Flux BP_FluxDataComponent delivers all the data you need to implement swimming. I’ve also prepared an example swimming implementation (BP_FluxSwimmingComponent) for the default engine mannequin so you can check it and learn. - Why blueprints? Is Fluid Flux slow because of that?
This system is fully implemented in blueprints but relies mainly on GPU (shaders/render targets). Yes, it might be faster in C++, but it would also stretch the development time. The cost of blueprint code will be reduced using Niagara in the future, making it work even better. - Is the Water plugin supported?
Water Plugin is not supported. Combining my water material with the water plugin mesh is possible but not officially supported. - Do I need this pack? Should I switch to Fluid Flux? Is it better than WaterPlugin/Oceanology or Aquatic Surface?
It depends on your specific requirements. The Fluid Flux excels at creating dynamic river simulations on heightfields and interactive scenes but doesn’t scale very well. If you only need a background ocean without detailed simulations, you might not want to go through the trouble of using simulations. However, Fluid Flux 2.0 introduces a new coastline domain system that can handle landscapes of up to 10km x 10km and provides an infinite ocean. I recommend playing the Fluid Flux demo to understand better whether it aligns with what you’re looking for.
You probably don’t need it if you can’t see the reason for purchasing Fluid Flux! I’ve prepared a simple comparison of the Fluid Flux and my other product, Aquatic Surface, that visualizes the difference:

That does not mean Aquatic Surface is bad. It’s a great product with a completely different feature set. You have to choose a product that fits your requirements.
Updates
Fluid Flux has received numerous updates, all provided free of charge to existing users.
You can keep track of the current progress of improvements on Trello. Numerous updates are planned, but I don’t have a specific timeframe. It’s essential to base your purchasing decisions on the product demonstrated in the demo rather than relying solely on my promises.
Please note that I don’t sell promises, future versions, free time, or lifetime updates. I also don’t work for marketplace customers. I sell the products ‘as is,’ and customers should base their decision on the product’s current state (demo and feature set), not on future expectations or unreleased features.
Every update is an additional effort driven by my passion for creating. Being obligated to complete something by a specific deadline can cause stress, and I prefer to avoid it.
Release notes
- Fluid Flux [1.1], Performance and usability improvements.
- Fluid Flux [2.0], Coastline effects, and water break.
- Fluid Flux [3.0], Underwater glass and lights
C++ Plugin
A new C++ version called Fluid Flux Plugin is currently being developed. The new version is nearly complete, and it will be available early next year (2025). For now, I can only present a short list of differences in the first release of the Plugin:
- Improved usability, enhanced editor tools, and better integration with Unreal Engine UI
- Simulation domain implemented in Niagara and new spline modifier
- Whole blueprints code rewritten to C++ (Github access)
- Improved performance (mainly CPU related)
- Better sequencer support
The Fluid Flux Plugin will be primarily targeted at larger studios and experienced developers, and it will be released as a separate product on FAB. While it’s not exclusive, modifying the C++ version will require programming skills and extra work on transferring existing projects, which I did not want to force on current Fluid Flux users.
Many concerned developers ask about the blueprint branch of the Fluid Flux. The excellent information is that The new programmer has joined to work on C++, so I can still focus on updating blueprints.
I plan to continue adding new features and enhancing tools as long as possible.
However, I cannot tell how long I can support two different product branches. I will evaluate the situation one year after the Plugin release (early 2026). A possible scenario is that I will switch focus to the C++ version and only provide minor improvements and engine-related updates to the blueprints. However, my final decision depends on many factors, such as:
- Interest in Pluign in comparison to the Blueprint version. If most users decide to switch and prefer to use Plugin, then there is no reason to continue development.
- Whether the BP version can still evolve, the blueprint’s limitations block many features, and at some point, adding another workaround may be too problematic.
- The complexity of transferring asset-related changes between the two versions. It may be exaggerated significantly when the differences between the two branches of the project are growing.
This information may concern those who have already invested in the Blueprints version of my product and are now interested in using the Plugin. I understand that, and I am looking into possible discounts for current owners of Fluid Flux.
Support
The weakest point of this product is its documentation, which may be incomplete in some areas. I may not excel at explaining things, but if you have any issues, I will try to resolve them. Please don’t hesitate to contact me.
- Documentation
- Video tutorials (some videos already deprecated)
Contact
I always answer support questions, but my availability is limited due to the many requests. I am concurrently working on updates to improve quality and efficiency. If there is no response, ping me again after a few days. If you have any questions or need assistance, feel free to reach out to me in one of the following ways:
Refund Policy
This refund policy ensures fairness for all customers and creators in the Unreal Marketplace. Refunds are typically granted for faulty products or those not functioning as intended. Please Refund Policy
Reporting bugs
This document provides essential guidance on reporting system errors. Learn how to identify, report, and analyze bugs to ensure smooth support.
License
The product is distributed under the Standard FAB license.
You can use this product in your projects and games, including releasing them on storefronts. However, distributing or selling the product’s source code is strictly prohibited.
If the standard Unreal Engine licensing model doesn’t meet your needs, please get in touch with me directly to discuss a custom license that aligns with your specific requirements. Please note that I do not offer free trial versions, educational licenses, or custom discounts.







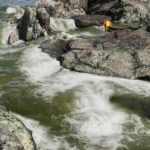
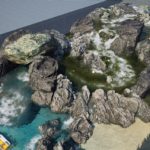


I’ve been working on a kayaking game for the last couple years and was very excited to see Fluid Flux. While it may not meet my needs for that project I am sure I can make use of it in other projects I have in mind. Thank you for the candid and honest list of what the product is designed to do and not do. I look forward to seeing how Fluid Flux evolves.
Holy crap man, this is truly amazing stuff. Keep it up, you have a gift for this.
Any reason that you didn’t put this into a UPlugin?
I had to release the product instead of polishing forever and rewriting it to c ++ wouldn’t change a lot at this state. I will work on c ++ version in the future to overcome some limitations and improve performance.
Look great, Im currently waiting on VR support.
The limitation about not being able to use Fluid Flux in caves… does this mean it’s only usable in outdoor environments? If that’s true, couldn’t there be a way to have the heightmap projection ignore certain object types? If so, you could have the projection ignore those objects. I’m assuming it works like a line trace – but maybe this isn’t an option.
Yes, it’s an option. Some meshes can be ignored and you can even create a phantom mesh that will only be used to generate a height map. It’s tricky and requires more work than a typical use case but doable with Fluid Flux.
Thank you for the great assets.
I am working with UE4.27.
With “BP_FluxNiagaraBubbles” to make the Niagara that will be in the asset appear,
I want to slow down the speed at which the Niagara bubbles rise,
Which parameter should I adjust?
I would appreciate it if you could help me. Thank you in advance.
You will have to modify the Niagara effect there are standard physics parameters like gravity (negative in this case) and damping.
Hi Krystian! Thank you for your prompt and courteous response.
If you just add the standard gravity parameter「gravity Force」to Niagara as a negative value,
the bubbles will fall once they rise.
This asset appears to be set to automatically rise when the Niagara bubble is placed in the underwater.
I would like to adjust this rise value.
I have looked at this off and on for a while and haven’t run into the solution. Pretty sure it is a rendering problem in project settings? The foam on rivers and ocean waves on 1.2 and 2.0 is extremely fuzzy. I didn’t have this problem with UE5 but when i updated to 5.1 and 5.2 I started having this problem.
Hard to tell based on the description. Is disabling TSR anti aliasing solving the problem for you ? Or maybe its the problem of the dithering enabled in material?
I played with it all day hitting dither/TSR/AA. Will come back to on a continual basis and tell you if i have success. To be more precise – it is the wave splash on the faster currents hitting a rock and any fast moving water like the waterfall or the top parts of the rivers.
your Fluid Flux is great work undoubtedly!
Our team is using Fluid Flux 2.0 for a 21KM-long coast line city-scale scene with a RTX 4090 and 128GB memeory.
Do you have any suggestions in setting up the Fluid Flux for such a massive and enormous scene as we still need optimizations.
Thanks you.
Maybe you can make a compromise and use a bigger WorldPixelSize and cut the resolution?
Amazing! Can I set it up as an event trigger so that the simulation can happen in a level sequence?
Yes, you can activate surce modifier from sequencer, check the “Sequencer integration” chapter 🙂
Hello buddy, I saw a video of an Actor looking around at the beautiful underwater sea view in a hemispherical glass cover, but why didn’t this sample file appear in the file package
Hello, the videos on my X channel present the upcoming update 3.0. Those effects are not yet available in the product. Sorry for the confusion. Im still fixing bugs and improving usability, it will be updated very soon (2-3 weeks). Thanks for understanding.
Thank you very much for your reply,this plugin has a powerful effect and is the best plugin I have ever used to make water. I hope you will improve it and make it better,I wish you a prosperous business