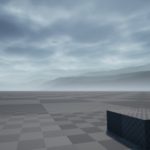
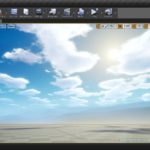
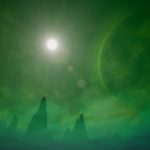
I’ve done some test witch volumetric fog rendering in UE4. Check out the results.
Author: Krystian
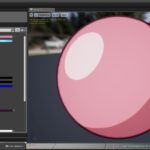
Sometimes we need to render outlines without using post process. For example on mobile devices and VR full-screen post-process calculations are too heavy so we have to find another solution. This short article presents geometry based outlines, very old and tricky method that I’ve used in the Anime Toon Shading package. Continue reading Backface culling based outlines
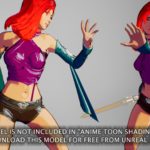
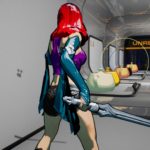
Main references to create Anime Toon Shading was “Gravity Rush” and “Dragon Ball FighterZ” so if you want to achieve this kind of feeling with dynamic cartoon lighting in your game, then this package will be a perfect starter for you.
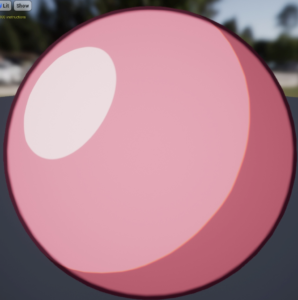
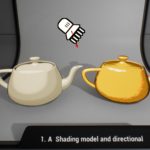
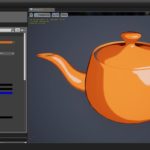
Anime Toon Shading is a post-process independent approach to cartoon style effect, which means it uses geometry based shading model that allows customizing every character on the scene to specific lighting conditions and works perfectly in the forward rendering mode.
Package contains a full lighting system that supports single dynamic directional light and multiple dynamic point lights. Perfect choice for VR games as well as mobile.
Features
- Advanced material configuration instanced per object specular/shading/outline
- Dynamic directional light support
Multiple dynamic point lights that can affect actors - Very fast and GPU friendly
- Material function, which can be used as an unlit/lit material
- Tested on meshes from paragon (great for stylizing assets)
- Geometry based shading. No need to use post-process uses, forward rendering mode works in VR and mobile.
- Interface for an easily combined dynamic toon lighting system with any actor
- Outline shell mesh (material for additional mesh rendered from inside)
- Multiple parameters designed with thinking of customizing toon shading on characters
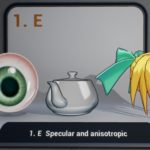
- Anisotropic specular (hairs), specular matcaps support (Eyes, Metal)
- Easy to integrate with external post-process.
- Toon specular parameters: Specular size, color, and translucent, softness
- Toon shadow parameters: Glossy effect
- Aberration effect, softness, width, two shading methods (texture and smoothstep function), multiple shading textures
- Toon outline parameters: width, softness, color, and translucency
Gallery
Release changelog
Version 1.3 (06.08.2018)
- Translucent and mask
- Two-dimensional gradients
- Gradient texture generator
Version 1.2 (12-06-2018)
- Light receiver positioning (4 modes available in ToonComponent - mesh/actor/bounds/toon)
- Added anisotropic specular (hairs)
- Added matcaps support (Eyes, Metal)
- Updated dynamic lighting combine function/transition
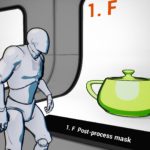
- Added material function for masking "Anime Toon Shading" in post process "MF_ToonShadingPostprocessMask"
- UseDynamicLighting flag (faster rendering of objects that uses only the direction of light)
- Example map updated
Version 1.1 (20-05-2018)
- Bugfixing and optimizations
- Example map updated
Version 1.0 (09-05-2018)
- The first version of the package released.
Documentation
Geometry based shading
There are two types of packages on the marketplace that supports toon/cel-shading in UE4. Post-process based (other packages) and Geometry based (this package). Both have cons and pros and It is important to understand the difference to know with them chose. A table below shows basic differences and possibilities that will be supported or blocked depending on what you choose.
|
Post-process based toon shading (Other packages*) |
Geometry based toon shading (This package) |
|
|
Description |
uses the final image generated by ue4 to translate scene colors on cartoon stylized images. |
uses the material system and meshes and is applied per object. |
|
Platforms |
PC (full post-process in forward rendered scenes is problematic) |
All platforms VR/PC/Mobile. Just works, this is the old-school method. |
|
Scene |
Full scene effect in one click. |
Need to be applied per object/per material. |
|
Usability |
Easy to use just plug and play. |
A lot of work to configure materials. Little complicated, need a setup for meshes. |
|
Tweaking per object |
Hard to customize shader per character. Tweaking parameters for one mesh can destroy the effect on others. |
Very functional and useful in setting up character shading. Easy to customize. Just open material and modify shading/ outline/colors/specular. |
|
Environment |
Easy to change the visual effect of the environment on the full scene. |
Global tweaking can be done by using shared material instances by multiple materials. |
|
Receiving shadows |
Supported by default. |
Not supported. |
|
Dynamic lighting |
Supported UE4 lights. It looks strange when you use more lights than 1 light. |
Implemented an independent dynamic lighting model. |
|
Emissive |
Not supported |
Supported by default. |
|
Fog effects |
Not supported |
Supported by default. |
|
Specular |
Not supported |
Supported by default. |
|
Outline |
Full scene |
Applied per model as shell mesh. |
|
Translucent |
Not supported |
Supported by default. |
|
Reflections |
Not supported |
It looks properly in reflections. |
|
Fog |
Not supported |
Supported by default. |
|
Receiving shadows |
Supported by default. |
Supported only partially by Lit material in forward rendering mode of older engine version. |
Probably there will be support for the post-process shading model in future versions of this package but in the current state, I’m focused on geometry-based shading.
Get started with material
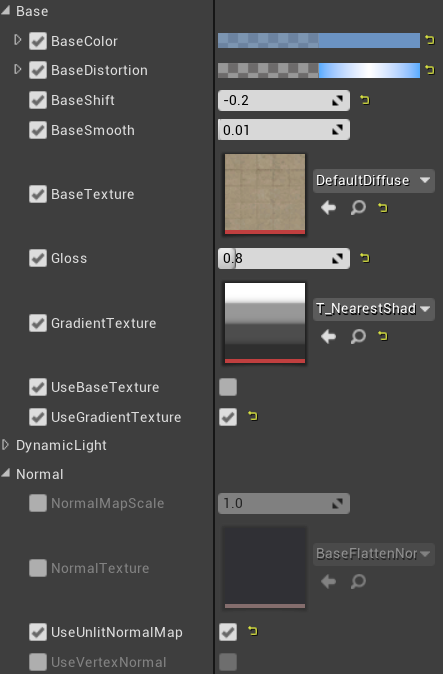 This part of the documentation covers the basics of creating material in Anime Toon Shading. The system is divided into two types of material that can be used on geometry lit and unlit. Both types of material support similar functionalities and parameters but there is a small difference:
- Unlit (M_ToonShadingUnlit) – Very fast but can’t receive shadows.
- Lit (M_ToonShadingLit) Little slower but allow to receive shadows.
To start working with Anime Toon Shading you need to create material for your mesh:
- Chose the material type that will be used on mesh for example M_ToonShadingLit.
- Click right and select “create new material instance”.
- Open material and set up parameters of new material as you like to see an object on the scene.
- Apply created material to your mesh.
|
M_ToonShadingLit |
|
|---|---|
|
Base Distortion |
Distortion of shadow on all RGB channel |
|
Base Shift |
The offset of the base shadow. |
|
Base Texture |
(UseBaseTexture) texture color multiplied by base color. |
|
Gloss |
Gloss effect. Changes the direction of the shadow to the camera. |
|
Gradient Texture |
(UseGradientTexture) Gradient texture used for shadow. Allow changing stepping mode of shading. |
|
Normal Map Scale |
Scale normal map vector. Active only in UseUlitNormalmap mode. |
|
Normal Map Texture |
The texture is used as a normal map. |
|
Outline Color |
Color of the outline. Alpha channel contains a width. |
|
Outline Coverage |
Setting a translucent outline |
|
Outline Smooth |
The smooth edge of the outline can be used as a fresnel too. |
|
Use Outline |
Enable/disable outline effect. |
|
Specular Color |
Color of specular. Alpha channel used for specular size change. |
|
Specular Smooth |
Smooth specular effect. |
|
Use Specular |
Enable/disable the specular effect. |
|
UseSpecularTexture |
Whether to use specular matcaps textures |
|
SpecularShinnenss |
Expose the specular texture color shininess. |
|
SpecularTexture |
Specify specular texture. Example matcaps can be found in matcaps folder. Matcap is a texture that is mapping on the mesh faced to the camera it is useful to initiate some metal gloss. |
|
UseSpecularLocalUV |
There are two types of specular texture UV Mapping. The local UV mapping is the specular mapping calculated in space of the camera. Non-local is world space mapping. |
Using directional light
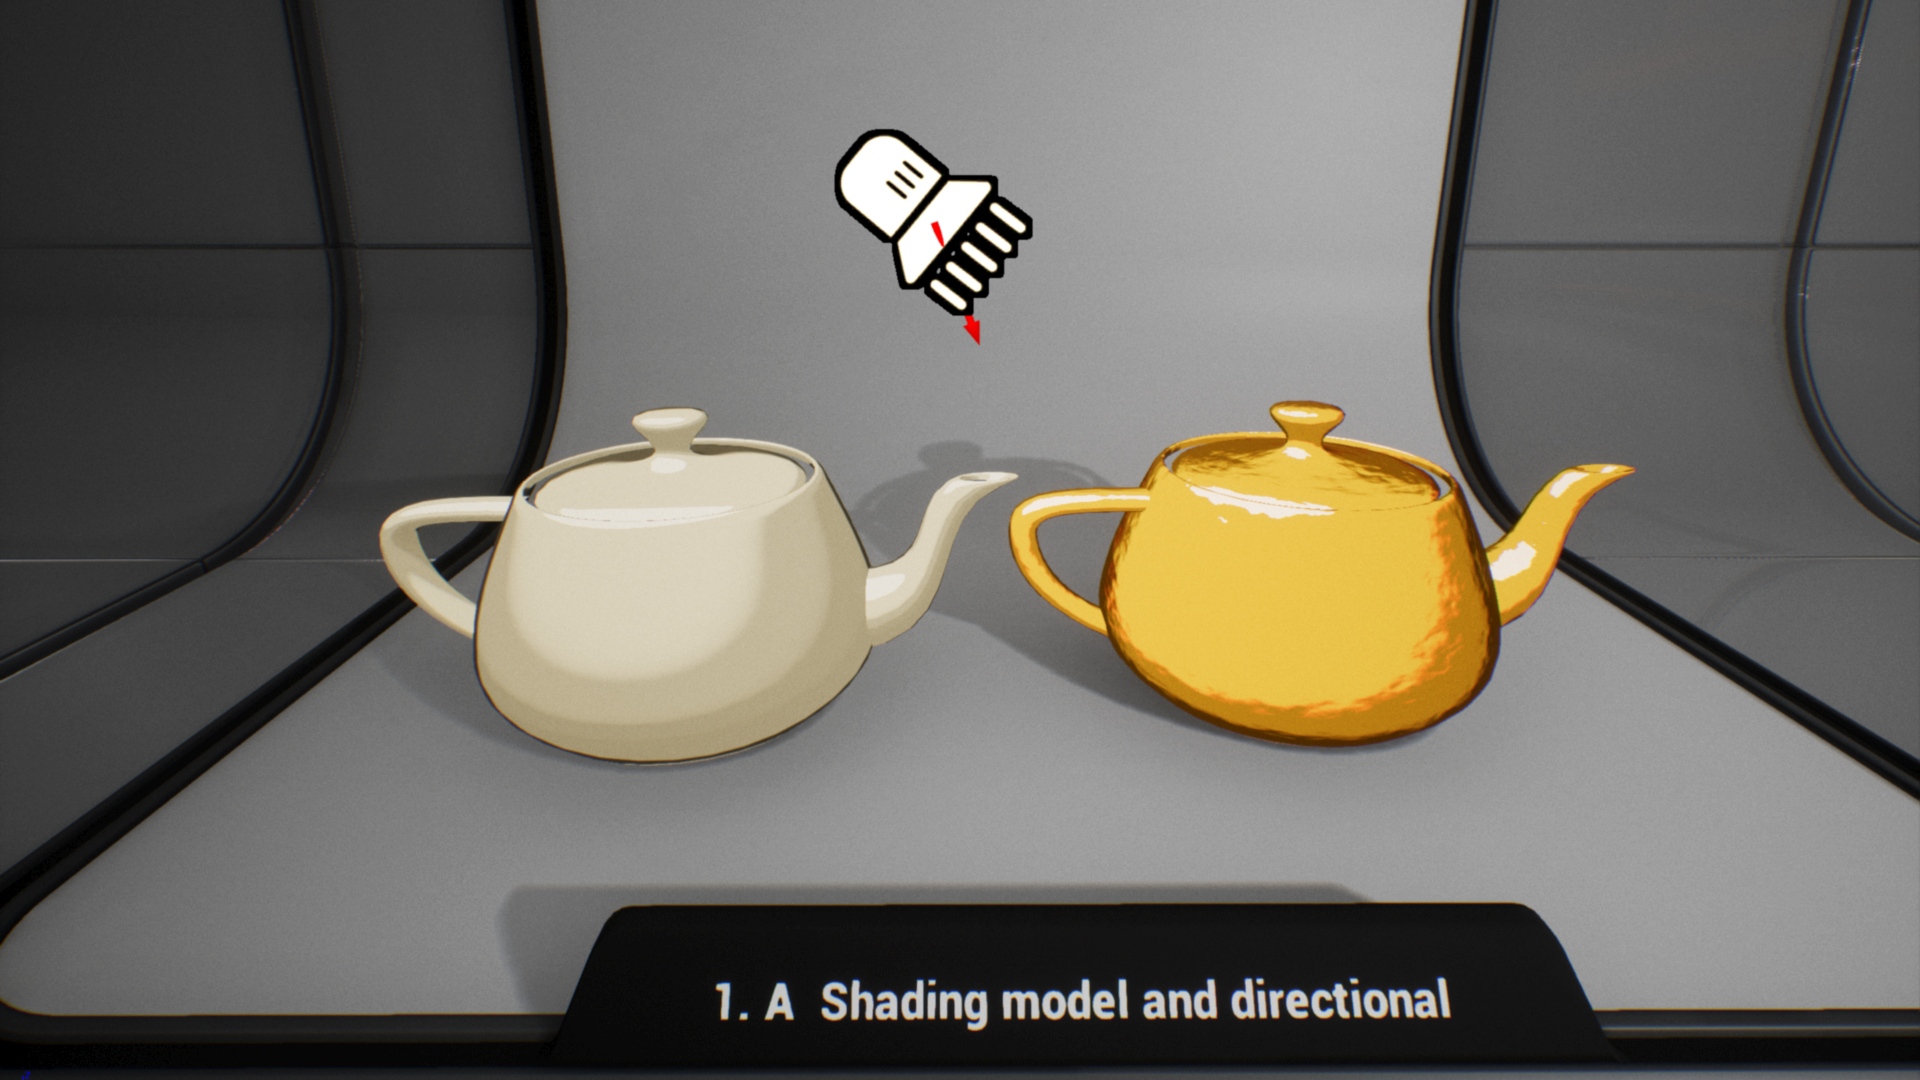
Directional light can be used for setting up global lighting that will be affecting all objects on the scene. Just drag and drop BP_ToonDirectionalLight on scene and setup parameters.
| BP_ToonDirectionalLight | |
| Rotation | Direction of light |
| Light Color | Color of direct lighting. |
| Skylight ambient | Color of indirect lighting. |
| Tick Interval | Frequency of updating the values. If the light will be static then set it to -1. |
Using multiple point lights
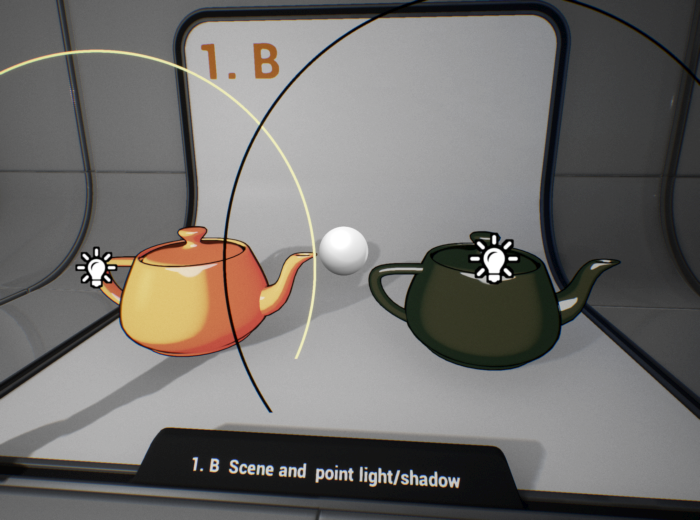
Anime Toon Shading supports multiple point lights that are combined into second directional light data and applied to the base shading model. That functionality can be used for light flashes like explosions, some additional lighting on the scene, and shadowing in darker places where the directional light should not affect the object.
The dynamic light will only affect objects that implement properly BI_ToonShading interface. You can use an example implementation and inherit a base class of static mesh (BP_ToonStaticMesh) and skeletal mesh (BP_ToonSkeletalMesh)
- Content Browser -> Crete Actor
- Select BP_ToonStaticMesh or BP_ToonSkeletalMesh
- Setup default mesh in the blueprint.
- Set Toon Shading material on the mesh (Get Started section describes how to create new material).
- Drag and drop created actor to your level.
- Drag and drop BP_ToonPointLight to your level. Set up parameters:
BP_ToonPointLight Intensity Light color and shadow multiplier. Light Color
Color of direct lighting. Shadow Color Color of indirect lighting. Position The position of the light. Scale (radius) The radius of lighting. Base Light Weight How base directional light color affects meshes in this light. 0 means additive, 1 means override the base light. Base Shadow Weight How base directional light shadow affects meshes in this light. 0 means override the base light direction 1 for no change. Scene Will be updated automatically after adding light to the scene. - Drag and drop BP_ToonScene to your level.
- Select BP_ToonScene and add Lights and Actors that should be managed by the lighting system.
Custom character interface
Sometimes there is no possibility to inherit example actors (BP_ToonStaticMesh, BP_ToonSkeletalMesh, ThirdPersonCharacter) that contains the implementation of dynamic lighting. Fortunately “Anime Toon Shading” is very extendable, you can modify your own character to be affected by dynamic Toon Shading lighting as well. It’s a bit complicated but believe me, I did everything I could to make it user-friendly.
- Open Character blueprint. Add BP_ToonScene reference attribute to your actor. Variables->Add:
- Variable Name Scene
- Variable Type BP_ToonScene
- Add a new component BP_ToonShadingComponent that will be used to communicate with the scene.
- Add a new function Toon Shading that will be evaluated to update lighting on the object. Functions->Add.

- Add ApplyShading evaluation for every mesh in pawn that should be affected by lighting. In this case, the character contains one Mesh.
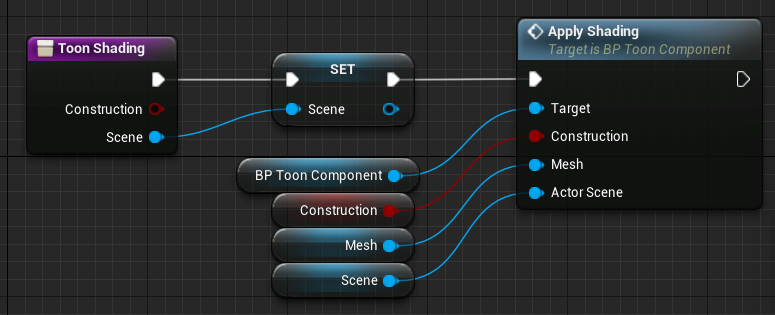
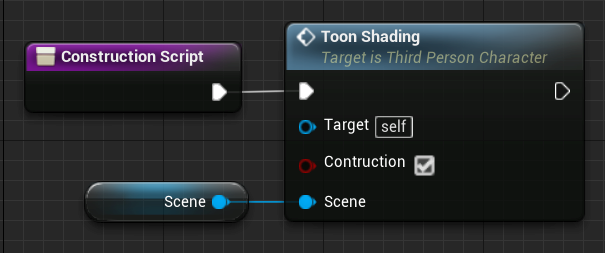
- Call function in the constructor to activate lighting on start.
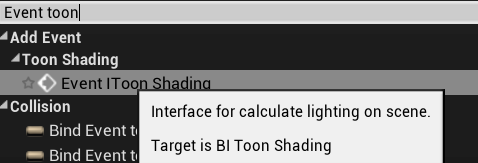
- Implement the ToonShading interface. Open Class Settings and add interface BI_Toon_Shading to list.

- Call toon shading update on events BeginPlay and IToonShading

Remember! This modification creates dynamic material instances to communicate with the scene manager, you should use them instead of creating a new one. Custom character interface
External post-process
It’s a good practice to combine two types of toon shading systems for example by using “Anime Toon Shading” for characters and post-process material for the environment.
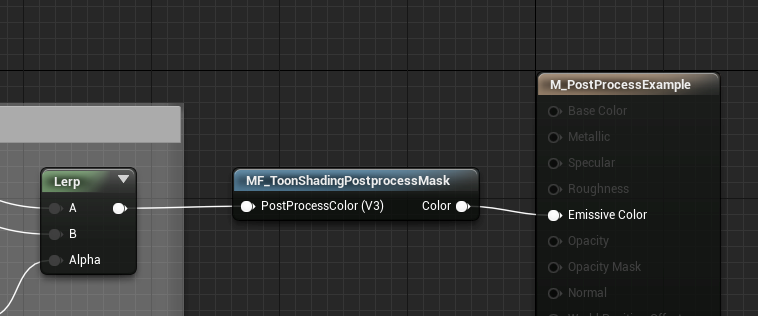
Post-process based toon shading should support excluding the shading materials that using “Anime Toon Shading”. Generally in this kind of problem full-screen mask tells the post-process shader where to live pixel is not changed. It can be implemented easily by using a custom depth stencil mask. This is a simple example of how to integrate this package with post-process material.
- Set up your project to use the stencil buffer. This functionality is required because we need an additional buffer to mark pixels rendered by AnimToonShader.

- Select mesh that is using “Anime Toon Shading” material and set stencil mask value:
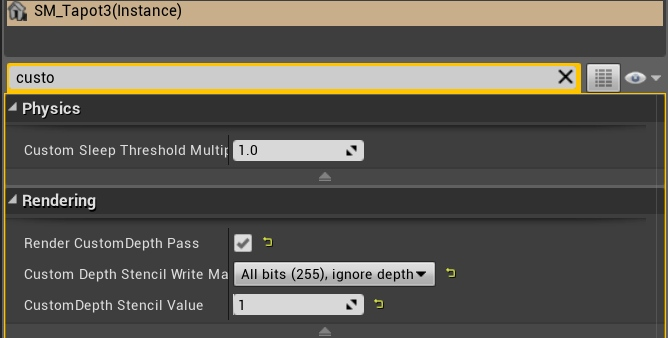
Remember: It is just an example configuration of the mask. If you already using custom depth stencil for outlines then you should reserve one bit for “Anime Toon Shading” masking.
- Use MF_PostProcessMask material function as a mask on your post-process effect:
Outline shells
The outline effect for forward rendering can be realized by creating a second expanded mesh with front face culling (rendered from inside). “Anime Toon Shading” contains tricky material that can do it for you. You can find an example of this part of the documentation in Demo/Characters/ThirdPersonCharacter blueprint.
- Duplicate mesh component in your character and rename to ‘Shell’.
- Initialize Shell in construction script
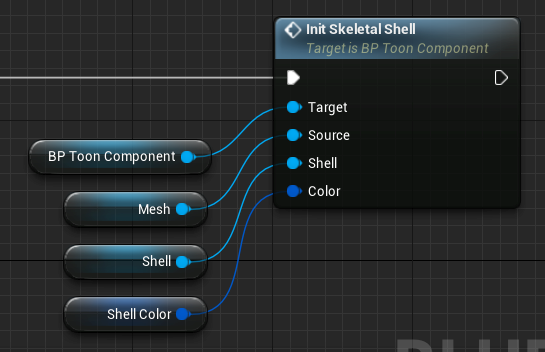
- You can add the attribute ShellColor to your blueprint or use MakeVector. The alpha value in this vector is responsible for the outline width.
- The shell material supports the vertex color alpha multiplier. You can locally control the width of the shell by painting (alpha channel) on the vertex color of the mesh. It is a cool feature used in the current generation games.
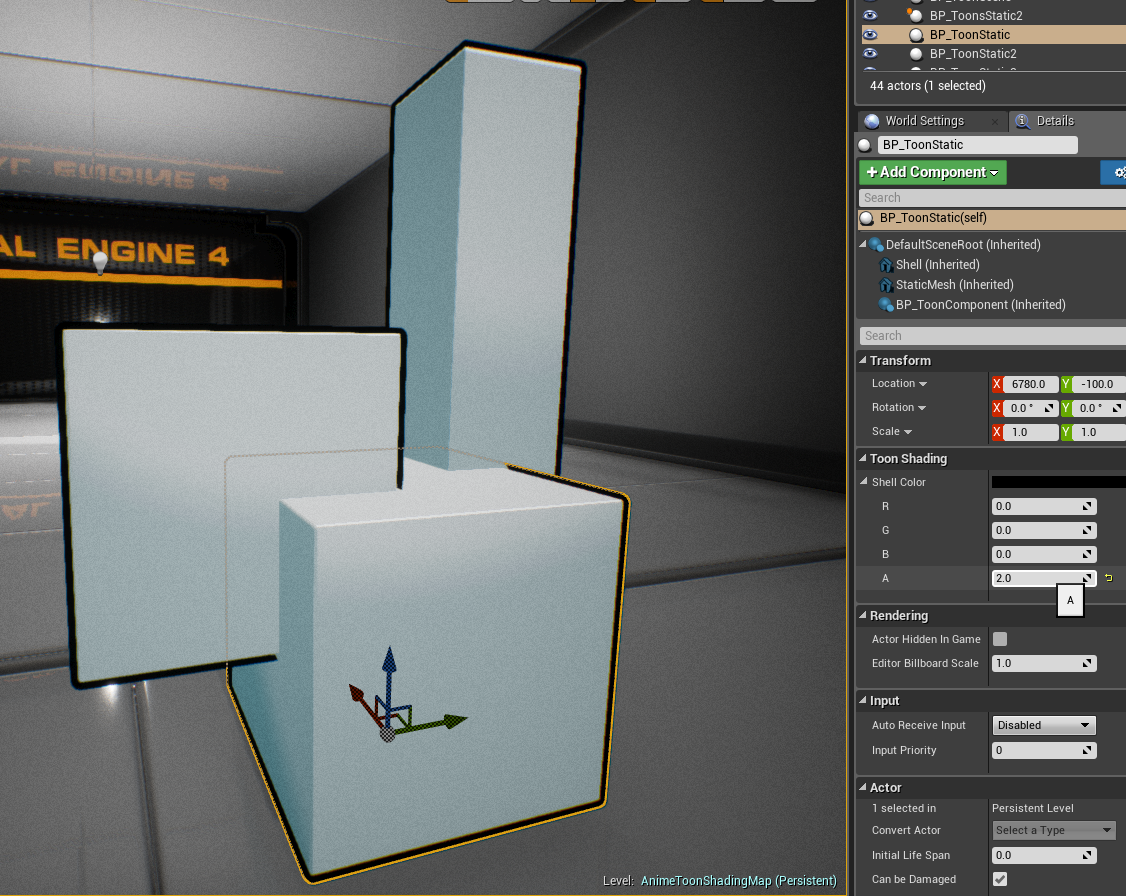
Flat surfaces
- Disable UseOutline in material
The reason is simple – it is problematic to implement a fully functional outline effect using only data in the mesh. An outline needs to be stimulated by external mechanisms. - Try to prepare meshes with rounded corners
It will make your shading look more smooth with the soft transition on the edges. - Use outline shell
A detailed description of the method can be found in the chapter “Outline shells”.
Questions & Answers
Dynamic lights? how it works in forward and deferred?
It is based on the observation that toon shading don’t need to be based on realistic lighting model. Anime Toon Shading material supports two directional lights. First one is global directional light shared by all objects on the scene. The second one is dynamic light calculated per mesh as the sum of closest point lights. The tricky part is to combine this two lights in the material to not destroy the shading on the mesh.
Does it work on mobile and VR? Forward rendering is supported?
Yes, it should work fine on this platforms. The standard unlit version of the material uses about 110 instructions (green complexity), cheapest can be lowered to 70 by setting flags useSpecular=false, useOutline=false, I don't have the mobile device to test so it'is hard to be sure but the materials are optimized for mobile.
Do the materials self-shadow?
Nope self shadowing is not available because this method uses material emissive color. However you can add dynamic light that will absorb directional lighting to simulate walking into shadow. Receiving shadows is supported only in forward rendering.
This shader works with post processing?
This implementation is geometry based. Material function can be injected in any material you want to add functionality of this shader. For full scene toon shading you should use another package.
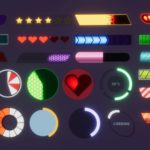
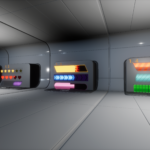
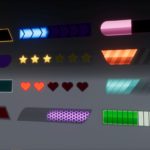
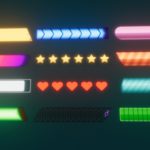
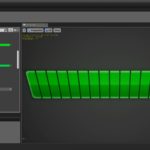
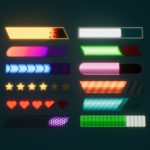
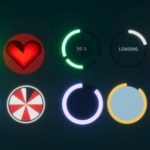
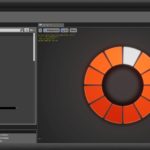
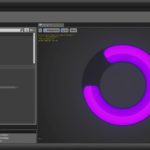
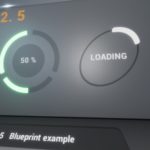
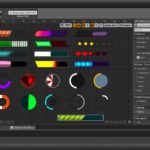
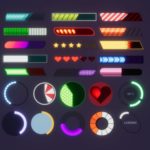
SDF Robo Progress Bars is an advanced master material usable for creating a wide range of customized progress bars. Package contains over 50 predefined excellent styles easy to use for various types of games. Material supports advanced customization that covers most of the possible design requirements. Thanks to using SDF functions instead of huge textures all created progress bars always stay sharp, well aliased.
Features
- Two types of shape circle bar/rectangular bar. Fully callable and extendable for more shapes.
- Signed distance functions based rendering. The shape is generated from mathematical functions that give the quality of ‘Vectorized’ graphics without using huge resolution textures.
- Configurable for all resolutions.
- KISS – One mesh per bar.
- Can be mixed with SDF and standard textures.
- Rounded corners of shape colors patterns and progress bar showing.
- GPU friendly, one draw call per bar.
- 23 different example themes that can be adjusted to requirements.
- Unlimited user-defined themes can be created easily using the available properties.
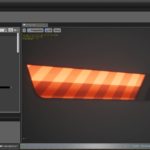
- Multiple advanced effects of progress bar – burning/fade.
- Easy to integrate witch UMG.
- Supported reparenting of themes between different shapes.
- Flexible modification options, each bar presented in this package can be created directly from another.
Gallery
Release notes
Version 1.1 (05.03.2018)
- circle bar mode
- 10 new presets of bars
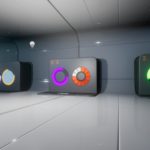
- additional demo room
Version 1.0 (22.01.2018)
- Releases basic version
Documentation
Showcase and material parameters
Creating a new bar
- Select bar from group ExamplesSurface/ExamplesUmg. Find a bar that looks closest visual to effect that you would like to achieve (all bars share the same functionalities so can be modified one to another but it’s faster to start from some point).
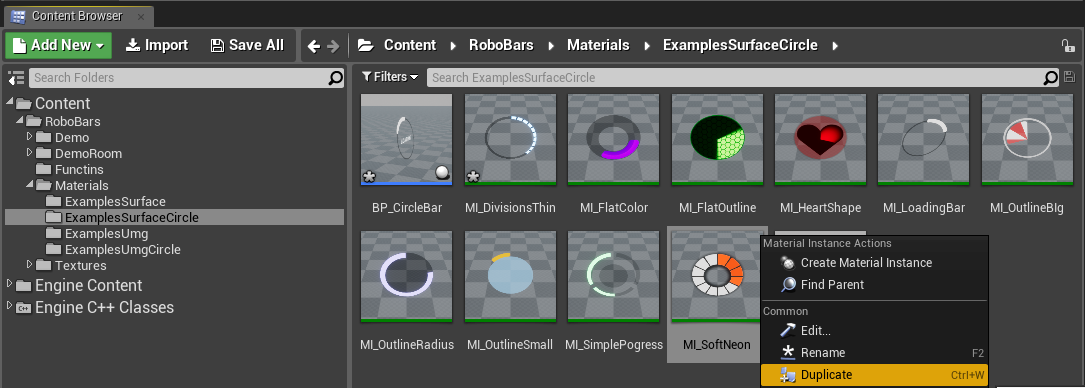
- Create duplicate or material instance from the selected bar.
- Set the name for the newly created instance of material. It’s good practice to start name from MI_Surface or MI_Umg. Open material and modify parameters.
- Modify the parameters of the new bar according to your requirements.
Basic types of bars
All bars used in the game should be created as Material Instance that derives from the build in types of materials. Multiple combinations of bars are possible based on bar shape and bar type. The base bar instance name is constructed according to the specified naming convention:
MI_ + BarType + BarShape + Bar
BarType – System is divided into two separate material instances that allow using this system on the surface meshes as well as on UMG widgets.
- Umg – material can be used on hud controls (widget elements).
- Surface – material used on regular meshes (planes in 3d space). Check ExamplesSurface folder to see all examples prepared for surface bars. UseInterface switch set false (for optimization).
BarShape – Allow to chose the basic method of bar visualization.
- Rect – classic rectangular bard that fills from on side to another.
- Circle – advanced bar that fills the circle.
Check ExamplesUmg, ExamplesSurface, ExamplesUmgCircle, ExamplesSurfaceCircle, folder to see all examples.
Using Robo Bars in UMG
- First place the Image widget on the hud widget.
- Then apply the progress bar material onto your image widget by setting the parameter Brush->Image as presented below:
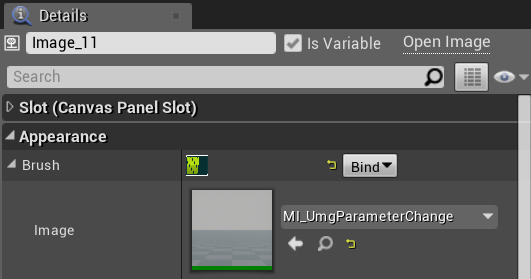
- Setup the material parameter called “Progress” in blueprint graph. You have to get dynamic material instance from the widget and set the parameter value.
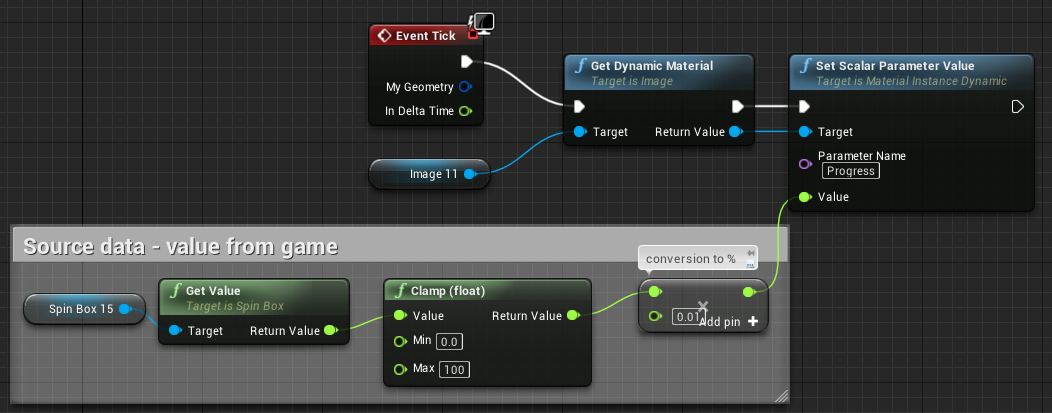
-
Progress is a basic value parameter in the master material in range between 0.0 (empty) and 1.0(fully filled) used for setting how much progress bar is filled.
Debug options override the behavior of progress bar by default to visualize the effect of changes in the preview. Find material that you used in your progress bar and disable the debug option by setting:
Progress->ProgressDebug = false
A simple example of using Robo Bars is presented in the demo (Demo/Blueprints/BP_Hud)
Signed Distance Fields
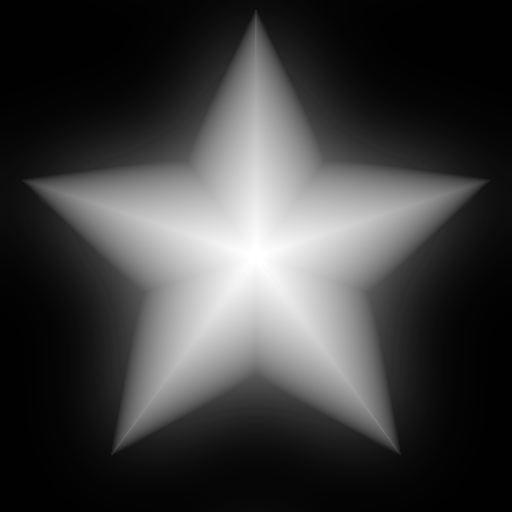
Signed Distance Field is an image where each pixel contains the distance to the nearest point on the boundary. An additional sign of distance allows determining if the pixel is inside or outside rendered shape. SDF image that looks like gradient can be loaded from a file or generated by mathematical functions called Signed Distance Functions.
One of the biggest benefits of using this method is very cheap and configurable antialiasing effect. The same method is used to render outlined/smooth high-quality fonts in Unreal Engine 4 based on low-resolution textures.
Package SDF Robo Progress Bars uses this method to render all bars in multiple ways.
- drawing smooth outlines, shadows, edges
- configurable division on bars
- combining multiple shapes
- round corners using smooth min function
Master material parameters
The progress bar is divided into 4 basic layers that are combined into one using translucent blending. Each layer is configurable and implements some additional effects.

- Outline layer (white)
- Shape layer (black)
- Progress layer (red)
- Pattern layer (blue)
Outline layer
The outline effect is very common in progress bars, it’s a great tool to highlight the shape or separate bar from the background to make it more readable. Outline layer is represented by the base shape. In final effect, it can be rendered as shape, filled background or stay invisible.
| Outline layer | |
| Use Outline | Switch that determinates whether the background outline should be rendered. When disabled then the background is filled by one color. |
| Outline Color | Color of outline/background layer. To make it fully invisible change color alpha to 0. |
Shape layer
Shape layer is to describe the shape of the bar and it is represented by combined signed distance functions. Shape layer is always active.
| Shape layer | |
| Use Shape Texture | Allow using SFD texture as shape description. |
| Use Shape Color Texture | Fill the shape by texture color multiplied by shape color. |
| Shape Color 1/2 | Colors of divides shape. |
| Shape Edge X/Y | Edge scale allows fitting bar into different aspect ratio. |
| Shape Scale X/Y | Scaling the visual part of the bar to fit into the mesh model. |
| Shape Slope X/Y | Allows you to create inclined progress bars |
| Use Shape Round 1/2 | Enable/Disable round corners on shape. |
| Shape Round | Strength of round corners in shape. |
Progress layer
Progress layer is used for drawing current progress (how much shape is filled by color/texture/effect).
| Progress layer | |
| Progress | Parameter used to steering fill of the progress bar. Active only when Debug is disabled. |
| Progress Debug | Debug options override the behavior of progress bar by default to visualize the effect of changes in the preview. |
| ProgressAnimU/V | Sets animated UV of progress bar texture. |
| ProgressUV | Define progress texture UV mapping. XY- Position, ZW-scale. |
| ProgressColor1/2 | Sets separate colors of the pattern used on the bar. |
| Use Progress Color texture | Allow to use progress color texture. |
| Progress Color Texture |
Texture of progress bar sampled based on ProgressAnimU/V. The final color of the bar is calculated by the multiplication of Colors and Texture. This option is useful for an additional effect like gloss/shadow. |
| Progress Direction |
Two functionalities in one parameter. Allow changing the direction of progression by setting positive-negative value. The negative value means that the bar will be filled from left to right and the positive from right to left. The absolute value of this value represents the blending of the progress bar into the shape layer. Big value = hard edge/small value = soft edge. |
| Progress Slope |
leaning of progress bar lines. |
| Use Progress Round |
Allow to use round corners on the progress bar. |
| Progress Round |
Represents the roundness of progress bar corners. |
| Use Progress Move |
If true then progress texture will be moved when Progress parameter changes. |
Pattern layer
Pattern layer describes the scheme of a division the bar into two colors.
| Pattern layer | |
| Use Divisions | Allow using automatic division of the bar on two colored patterns. |
| Divisions Jump Hard | Hard jumping between progress values. Round to closest. |
| Divisions Jump Soft | Soft jumping between progress values. |
| Divisions Count | Number of divisions on the bar. |
| Divisions Gaps | Distance between divisions bars. |
| Use Pattern Texture | Allow using texture as the division of the bar into two colored patterns. |
| Use Pattern Texture Progress | Allow using texture as the division of the progress bar on two colored patterns. |
Layers antialiasing
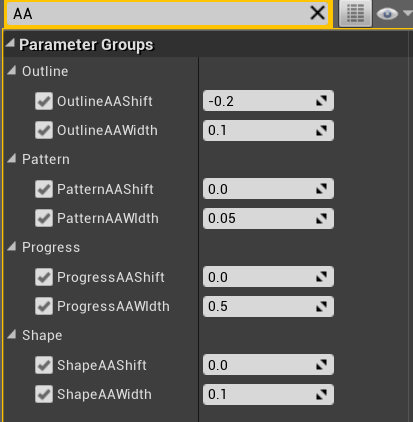 Each layer of bar contains parameters designed especially to control antialiased and smooth edges. This functionality allows to set up hard or soft blending between lower and higher layer.
| Antialiasing | |
| Width | Range of smoothness. Bigger value allows making smooth edges of the layer. |
| Shift | Parameter shift is related to zero position on SFD. Determinates the edge size of the layer. Can be used to set up outlines. |
From UMG to Surface
Sometimes there is a need to change Surface material into UMG to render on hud without loss of all parameters set in the material. This operation is well supported by UE4.
- Open material that needs to be changed to support UMG/Surface mode,
- Find option General->Parent and change to MI_Umg*Bar/MI_Surface*Bar depends on your needs.
Explanation of UE4 mechanism. There are two differences between UMG and Surface materials:
UMG does not support vertex interpolators so UseInterface needs to be set false in materials used in UMG. Surface allows for vertex interpolators so it is used as an optimization.
| MI_SurfaceRectBar MI_SurfaceCircleBar | MI_UmgRectBar MI_UmgCircleBar | |
| UseInterface | false | true |
| MaterialDomain | Surface | User Interface |
Questions & Answers
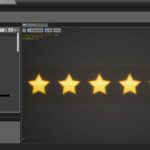
How would I go about changing the number of stars
PatternUV = (R=0.000000,G=-0.100000,B=5.
Why I can’t control the progress value?
It's because of the debug option "Debug Progress" is enabled by default in all bars. That is very useful in testing and previewing bars. Open your bar material and change Debug Porgress=false.
Is there a second layer of bar usually called ‘buffer’?
The easiest way to do this in Robo Bars system is by creating two bars:
- Background bar with buff.
- Foreground top layer bar where: Outline color and shape Colors are set to fully transparent. (only progress will be rendered)
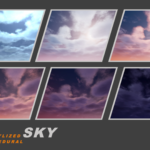
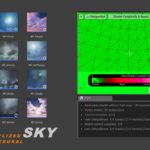
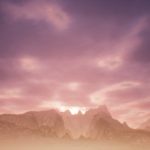
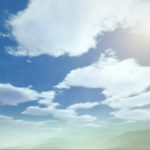
Fast Stylized Procedural Sky is a unique dynamic sky material and advanced weather system that is perfectly balanced between quality and efficiency. Designed and optimized specially for Mobile, Virtual Reality, and stylized PC/Console games.
Features
- GPU friendly works efficiently even on VR/Mobile. Unlit material without blending uses one draw call
- Over 60 parameters to customize
- Network replication supported
- Clouds lighting with scattering and shadows changes depending on sun position
- Clouds shadow casting, height fog, and static and dynamic skylight cubemaps
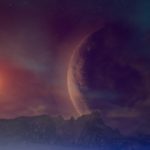
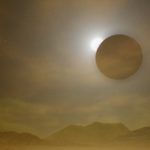
- Configurable sun and moon, lens effect, eclipse and stars scintillation
- Atmospheric sky gradient with tilting in sun direction
- Customizable automatic clouds UV calculation
- Moon normal-mapping and lighting calculated based on relative sun and moon position
- Time of day curves and advanced preset system
- Multilayered clouds
- Wind direction and clouds speed
- Smooth transitions between weather states based on preset system
- Landscape backgrounds interleaved with clouds, static clouds, and stars layer
- Skydome and skysphere mode
- The material is based on the new unpublished before method for fast calculation of procedural clouds lighting. You will not find this solution anywhere else!
Technical details
- Sky material (ONLY 150 instructions! and ONLY 4 texture samplers used!)
- Directional light shadow material.
- 1 blueprint that uses material and implements time of day and preset system
- 1 static skylight cubemap recapture helper blueprint
- 1 Sky shadow material
- 3 Skydome and Skysphere meshes
- 10 tilled clouds textures 512×512 with encoded four depth traces on channels
- 1 Moon normal map texture 512×512
- 1 Background equirectangular texture 2048×1024 (R-stars, G-Background clouds, B-Distortion clouds)
- 8 Color curves for simulating the day and night on Earth
- 12 presets of weather (sunny, cloudy, foggy, snowy, smoky, stormy, clean, rainy, half sunny, gloomy, blizzard, overcast)
- 3 time of day presets
- 3 Landscape backgrounds textures 4096×1024 for skydome (depth encoded as alpha)
- 1 Landscape background textures 4096×2048 for skysphere (depth encoded as alpha)
- 4 example static cubemaps for default skylight
Showcase
Release notes
Version 1.6
- Time of day exposed to the cinematic, editable sky in the sequencer
- Added UVHorizon parameter that changes the horizon from flat to round
- Time Cycle Duration - useful you need to set day-night cycle duration.
- Added the lightning effect with clouds scattering and skylight intensity
- Changed background clouds color from additive to translucent (more customization options)
- Updated weather presets and color curves
- Added directional light fog scattering color
- Added moon scattering
- Material cleanup
- Documentation moved to WordPress
- Added new example map (stylized anime, event-driven lighting and weather)
Version 1.5 (16.06.2018)
- Added time of day presets system and example color presets
- A second configurable layer of clouds (optional because uses 50 instructions)
- Added versioning (current version 15) - my future changes in the system should not affect your current state of work since now ;]
- Parameter: UseExternalSunDirection - allow to use direction calculated in external system.
- Fixed clouds movement on the ground when sun direction is changed manual.
- New weather preset “WP_Stylized”
- Added flag for syncing moon and sun rotation around the planet
- Fixed replication of recapture skylight, shadow casting, and directional lighting
Version 1.4 (26.03.2018)
- Added replication of sky parameters and presets. (server changes the weather)
- Added Clouds Bloom parameter.
- Added Switch for sky transformation world/local space. Sky can be properly attached to objects now.
- Fixed moon transformation (360 degrees = 1 day)
- Added MoonVisibleDuartion parameter
- Added SunVisibleDuartion parameter.
Version 1.3 (17.01.2018)
- optimization: UV calculations moved to vertex shader (10 instruction less in main shader no quality loss)
- support for precomputed blended cubemaps
Version 1.2 (03.12.2017)
- casting clouds shadow on ground
- supported change between skysphere/skydome
- 10 additional textures of clouds
- lens flare (experimental)
- additional moon movement
- tone mapping added for Mobile ES2 (same look like on PC)
Version 1.1 (17.11.2017)
- Static world backgrounds interleaved with clouds (mountains, city, big planet, ring).
- Sky light interaction recapture frequency based on time and preset change
- Height fog interaction (color change)
- Sun eclipse and stars scintillation added
- Stars/Moon Brightness multipliers added
- Lighting on scene based on preset
- Time control function (set time with transition duration and ease function)
- Presets can change scene lighting, it's dark when we select cloudy weather
Version 1.0 (08.11.2017)
- The first version of the package released.
Remember that your positive rating and comments are motivating me to do the next update.
Documentation
Get started
The easiest way to start working with Fast Stylized Procedural Sky is to For start watching the tutorial that shows how to use basic parameters of the blueprint:
- Unpack FastStylizedProceduralSky into Content in your project.
- Open project and you should see a FastStylizedProceduralSky package with the following content:
- Drag & Drop BP_FastStylizedProceduralSky on your scene. (Remember to remove the old sky that you used before on your scene you don’t need this anymore)
- Select FastStylizedProceduralSky blueprint that you just put on the scene and set up lights in the external tab:
Actors Sun Light External directional light used for lighting from the sun. The system will automatically change the direction and color of this light during the time update. Moon Light External directional light used for lighting from the moon. The system will automatically change the direction and color of this light during the time update. Sky Light External skylight used for global lighting on the scene. System recapture during the update. The frequency of recapture can be changed by. Height Fog External fog used for cover the scene by fog. System changes the color of fog based on time of day. - Press play and enjoy the show.
Remember! Only movable light can be changed by Fast Stylized Procedural Sky.
Remember! Enable dynamic lighting (no lightmaps) in projects settings to fully exploit the abilities of the time of day cycle.
Sky system
Fast Stylized Procedural Sky is divided into a few basic systems that can work in cooperation as well as in separation either systems can stay inactive for manual customization.
| External data | Constant external variables that are not managed by the system. Externa data can be modified during gameplay. |
| Time of day system | Responsible for the passage of time calculations celestial movement and sampling curves of colors over time-based on sun height. Can be updated based on curves or presets. |
| Weather system | The preset system manages the weather preset selection and allows interpolation between all presets. |
| Cubemap capture | Allow capturing cubemaps of the sky. Usable optimization to avoid update the skylight dynamically. |
All default properties of Fast Stylized Procedural Sky blueprint are editable only if Weather Preset System and Time of Day System is disabled. Three steps are needed to disable both systems:
- (Time Of Day) Use Time Of Day Curves = false,
- (Time Of Day) Time Of Day Change Mode = BlueprintDefaults
- (Weather Preset) Weather Change Mode = BlueprintDefaults
From this time all default properties of the sky can be manually customized for specific weather and time of day conditions.
External data
External options in Fast Stylized Procedural Sky blueprint allows stylizing final result for wide range types of games.
| External | |
| Saturation | Changes in the color saturation of the sky allow making the scene more colorful. |
| Clouds bloom | Changes the emissive of clouds. |
| UV Scale | Scales UV coordinates of clouds. Used for changing the size of clouds on the sky. |
| UV Layers Size | Scales UV coordinates of separate clouds layers (xy – first layer, zw-second layer) |
| Clouds Layer1 | The texture of clouds in the first layer. |
| Clouds Layer2 | The texture of clouds in the second layer. |
| Horizon Tilt | Tilting of horizon color into the sun direction. Better color gradient when the Sun is near the horizon |
| Wind Force | Multiplies speed and direction of clouds by the force of the wind |
| Sun Radius | Size of the sun. |
| Sun Shine | Shine effect around the sun. |
| Sun Max Altitude | Max vertical angle of the sun in the middle of the day. |
| Sun Azimuth | The direction where the sun appears on the horizon. |
| Day Duration | Allow changing the day duration. Depends on Sun Max Altitude (better results is lower than 90) |
| Moon Radius | Size of the Moon. |
| Moon Shine | Shine effect around the moon. |
| Moon Roll | Moon rotation in a roll. |
| Moon Rotation | Rotation of moon direction on the sky. Yaw Azimuth, Altitude, and Zenith. |
| World Rotation Speed | Background stars and clouds rotation in time. |
| World Layer Texture | The texture used as the background landscape. Texture requires encoding depth value (distance from the camera) in the alpha channel. |
| World Layer Fog | The landscape layer hides in the fog. |
| World Layer Depth | Scale depth in the landscape layer allows for interleaving with clouds. |
| World Layer Color | Landscape world layer color multiplier. |
Fast Stylized Procedural Sky supports casting shadows from the sun on the ground.
| External Parameters | |
| Grounds Shadow Material | Shadow material is mapped on the ground by light function in directional light. Example material instance in package MI_DefaultGroundShadow. |
| Ground Shadow Scale | parameter scales the UV mapping of shadow. |
| Ground Shadow-Soft | Blurs the edge of clouds shadow on the ground. |
This effect is implemented based on Light Function material that unfortunately is not supported on mobile.
Time of Day system
The time of day system is responsible for the passage of time calculations celestial movement and sampling curves of colors over time-based on sun height.
| Parameters | |
| Time Of Day | The current time of day in hours. Range: <00:00-24:00> |
| Time Change Speed | Speed of change the time in time day cycle in minutes. 1 real second = 1 minute in the game. Set 0 to stop the time. |
| Moon Change Speed | Speed of change the moon direction on the sky during the update. Yaw Azimuth, Altitude, and Zenith. |
| Use Time Of Day Curves | Activates TimeOfDay curves. When enabled overrides default parameters of blueprint |
| Time Of Day Curves | List of curves used by the system to override colors in curve mode. |
| Time Of Day Settings (Struct) | The current list of settings precalculated from preset or curves. |
| Time Of Day Preset List | List of presets used by the system to override colors in preset mode. |
| Time Of Day Preset Change | Configuration of the preset system for time of day. |
Time of day system changes a number of parameters of the sky based on time of the day like sun color, clouds colors, fog colors etc. The system can be updated in two modes:
- curve system
- preset system
Both modes exclude each other to change between these modes use flag Use Time Of Day Curves. Here is the list of parameters that can be controlled by each of the systems:
| Time Of Day Settings (Struct) | |
| Sky Upper Color | Upper color of the sky |
| Sky Lower Color | Lower horizon color of the sky. Horizon falloff intensity in the alpha channel |
| Clouds Upper Color | Color of Upper dynamic clouds |
| Clouds Lower Color | Color of Lower dynamic clouds |
| Clouds Secondary Color | Clouds color multiplier for the second layer. |
| Clouds Background Color | Color of static background layer of clouds |
| Sun Color | Sun color. Alpha channel stores the intensity. |
| Moon Color | Moon color. Alpha channel stores the intensity. |
| Stars Color | Stars color. Alpha channel stores the intensity. |
| Fog Color | Height fog color. |
Time of day curves
List of all Time Of Day settings can be controlled by curves. The curve system is active only when Use Time Of Day Curves = true. All defined curves are sampled based on the sun height. Mapping from time to sun height:
| Time of day | Sun Height (curve sample position) |
| 00:00 | -1 |
| 06:00 | 0 |
| 12:00 | 1 |
| 18:00 | 0 |
If the curve is not defined in the Time Of Day system then sky uses the default parameters from the time of day preset.
A simple example that shows how to change the horizon color using the time of day system:
- Find curve to change in sky blueprint: Blueprint->SkyLowerColorCurve
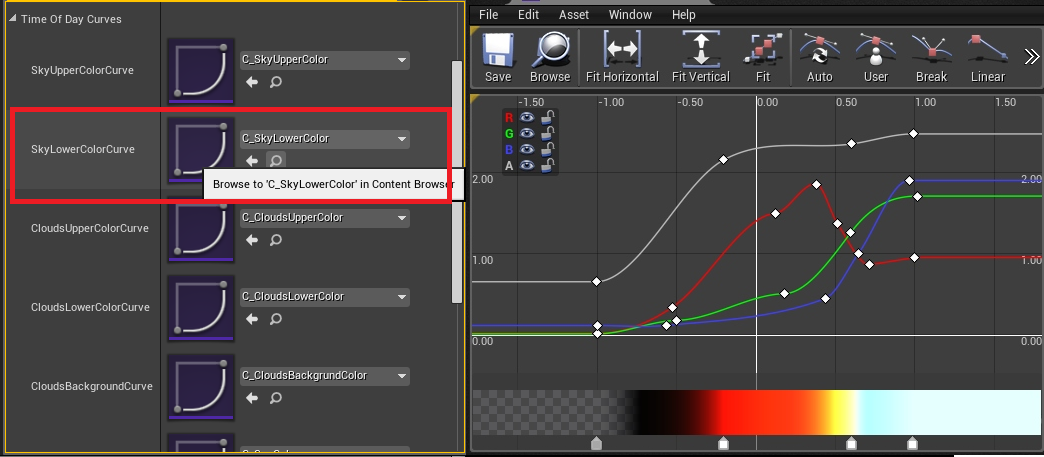
- You can edit the existing C_SkyLowerColor or duplicate the curve and replace a value of the SkyLowerColorCurve parameter in the blueprint.
Time of day presets
Basically the preset is a collection of predefined Time Of Day parameters that can be loaded to the sky. The preset system allows interpolating between these parameters and load custom settings for specific conditions. Time of day presets library can be found in TimeOfDay directory there are three basic examples presets BloodyMidnight, BlueNight, Pinky.

| Time of Day Preset System | |
| Time Of Day Curves | Determines whether the system uses curves or preset systems to update the time of day. Set false to use presets. |
| Time Of Day Settings | Currently loaded settings of time of day. |
| Time Of Day Preset List | List of presets from the library to use in the project. |
| Time Of Day Preset Change | Defines how the preset will change during the game. |
Time of day preset system is active only when Use Time Of Day Curves = false.
| Time of Day Preset Change | |
| Selected | Index of selected preset from the list. Should be smaller than the length of the Preset List. |
| Reload Selected | Reload checkbox/button. Click to reload the selected preset and see results in the UE4 editor preview. |
| Transition Func | Transition type of interpolation between the time of day presets. |
| Speed | The speed of interpolation to the next preset. |
| Duration | Duration of transitions between presets. |
| Mode | Defines how the preset will change in time. (more details about modes below) |
| Change After Time | How long the system will way to automatic change to the next preset. |
There are multiple methods to activate preset in the project that can be defined in Change Mode:
| Preset Change Mode | |
| Default Properties |
The Time of Day Preset System is disabled and sky uses properties from the blueprint. In this mode, the designer is able to change each parameter manually in blueprints. There are few functions that can be used for steering presets in this mode:
|
| Selected Preset | Preset System uses an index of preset that I currently selected. In this mode, the designer is able to manually select the preset used by the game. |
| Random On List | In this mode, the preset is automatically selected from the list by random function after a time defined in Change After Time attribute. |
| Next Preset On List | In this mode, the preset is automatically selected by jumping to the next preset on the Preset List. You can prepare your chain of presets that changes during the day. |
Adding a new preset to the library
The library of time of day presets can be easily extended. Few steps are needed to create and customize a new preset:
- Open Select TimeOfDay directory and preset that will be extended.
- Click right and select the option Create Child Blueprint Class.
- Set the name and attributes in default properties of the newly created class.
- Now preset is ready to use. Add preset to Time Of Day preset List in Fast Stylized Procedural Sky blueprint and start using as described in the section dedicated using a standard library of preset.
- There is no preset editor. Just edit preset settings in the blueprint on the scene. Results of your changes you will see in the scene preview. After preset is finished just copy preset settings group and paste to your preset class.
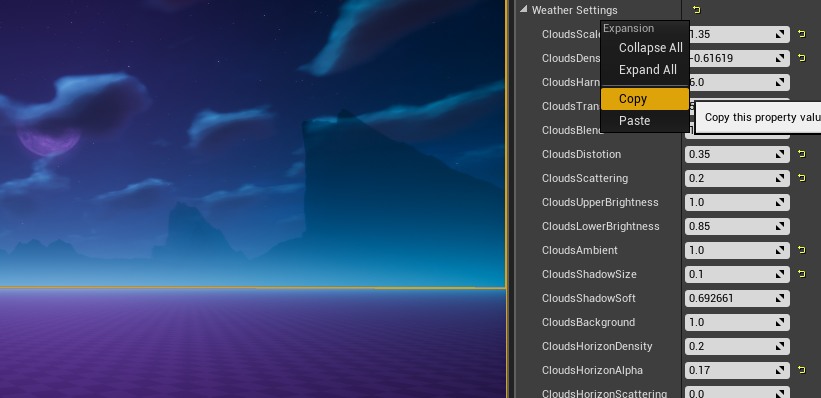
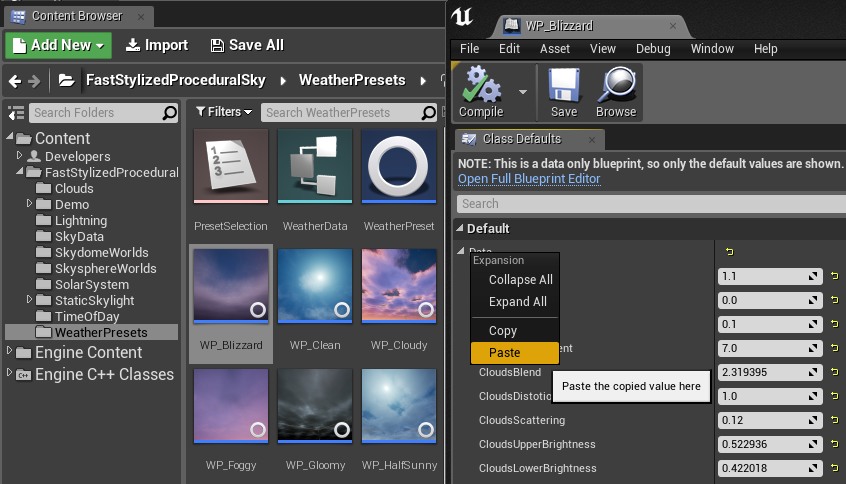
Preset settings are stored in structure so you can copy current settings of the sky to your new preset. Change in preview and then copy to preset – It is the easiest way to tweak parameters for preset. The other method to updating the presets is by modifying a preset that is set as “selected” and click “reload selected” after finishing the modifications to see the result.
Event-driven time
Fast Stylized Procedural Sky has external functions that allow controlling the time of day for example from the level blueprint.
| External functions | |
| SetTime | Changes the time of day with interpolation at specific duration. |
| SetTimeOfDayByIndex | Sets the time of day preset by index. |
| SetTimeOfDayExternal | Sets the time of day external preset. |
| SetTimeOfDayChangeMode | Sets the time of day change mode and duration. |
Weather system
Fast Stylized Procedural Sky comes with a library of presets for different types of weather: cloudy, sunny, clean, rainy, stormy, foggy, overcast, half sunny, glowy, blizzard, stylized. Each preset is just a list of predefined parameters that will be loaded to the sky after activation. The preset system manages the weather preset selection and interpolation between them.

| Preset system parameter | |
| Weather Preset List | List of presets from the library to use in the project. |
| Selected Weather Preset | Index of selected preset from the list. Should be smaller than the length of the Weather Preset List. |
| Reload Selected | Reload checkbox/button. Click to reload the Selected Weather sky preset and see results in the UE4 editor preview. |
| Weather Change Transition | Transition type of interpolation between weather states. |
| Weather Change Speed | Speed of interpolation to next preset. |
| Weather Duration | Time to start another preset based on current change mode. |
| Weather Change Mode | Defines how the weather will change in time. (more details about modes below) |
There are multiple methods to activate preset in the project that can be defined in Weather Change Mode:
| Weather Change Mode | |
| Default Properties |
Weather Preset System is disabled and sky uses properties from the blueprint. In this mode, the designer is able to change each parameter manually in blueprints. |
| Selected Preset | Weather Preset System uses the index of preset that is currently selected. In this mode, the designer is able to manually select the weather used for the gameplay state. |
| Random On List | In this mode, the preset is automatically selected from the list by random function after a time defined in Weather Change After Time attribute. |
| Next Preset On List | In this mode, the preset is automatically selected from the list by the incrementation function. You can prepare your weather cycle chain that changes during the day. Example: Foggy->Cloudy->Sunny->Cloudy->Rainy->Gloomy->Stormy->Foggy |
Event-driven weather
Fast Stylized Procedural Sky system can be configured to changing presets by events from the game. There are a few functions that can be used for steering presets:

- Set Preset Change Mode – Allow to change mode and duration of preset that is used in modes other than Blueprint Default.
- Set Preset External – Sets the preset from the library. Transition duration is how long the weather will be in transition.
- Set Preset External – Sets the preset from the list of presets by index. Transition duration is how long the weather will be in transition.
Example:

Adding a new preset to the library
Sometimes the game requires unique conditions for the specific situation in the game. The library of presets is expandable and weather designers can create their own presets and share parameters with other users of the system. Each preset is defined as Blueprint Class that extends from WeatherPreset class.
Creating a preset:
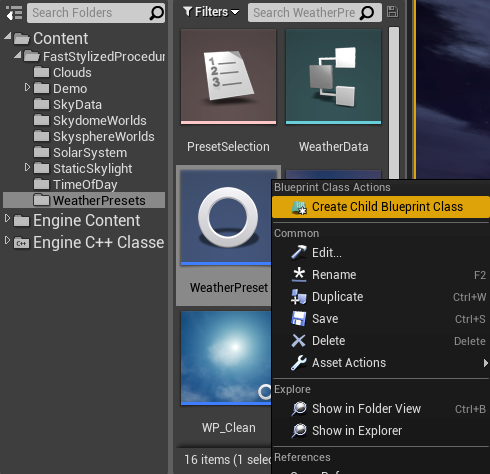
- Select preset that will be extended.
- Click right and select the option Create Child Blueprint Class.
- Set the name and attributes in default properties of the newly created class.
- Now preset is ready to use. Add preset to Weather preset List in Fast Stylized Procedural Sky blueprint and start using as described in the section dedicated using a standard library of preset.
- There is no preset editor. Just edit weather preset settings in the blueprint on the scene. Results of your changes you will see in the scene preview. After the preset is finished just copy the weather preset settings group and paste it to your preset class.
| Weather preset settings | |
| Clouds Scale | The scale of clouds layers multiplier. Resize clouds per preset |
| Clouds Density | The density of clouds. Covers cover of the sky by clouds |
| Clouds Harness | The hardness of clouds color layer. |
| Clouds Translucent | Translucency from cloud to background |
| Clouds Blend | Scale smooth blending of clouds edge |
| Clouds Distortion | Distortion of clouds color layer |
| Clouds Scattering | Sun scattering through the clouds |
| Clouds Upper Brightness | Light intensity in upper parts of clouds |
| Clouds Lower Brightness | Light intensity in lower parts of clouds |
| Clouds Ambient | Impact of sky color on clouds lighting |
| Clouds Shadow Size | Size of shadow under the clouds |
| Clouds Soft | The softness of shadow under the clouds |
| Clouds Background | Background clouds color intensity |
| Clouds Horizon Density | The density of clouds on the horizon |
| Clouds Horizon Alpha | The fade of clouds on the horizon |
| Clouds Horizon Scattering | Scattering of clouds on the horizon |
| Horizon Falloff | Falloff of horizon color |
| Wind Force Scale | Wind force multiplier. Controls speed of clouds per preset |
| Wind Dynamic | Scales relative movement between layers of clouds |
| Wind Dispersing | Rotates relative movement between clouds layers |
| Skylight Brightness | Sun brightness multiplier |
| Second Layer Color | The color multiplier for the second layer of clouds. |
| Second Layer Alpha | Translucency multiplier for the second layer of clouds. |
| Second Layer Scale | Scale multiplier for the second layer of clouds. |
| Second Layer Wind | Wind multiplier for the second layer of clouds. |
Lightning effect
Fast Stylized Procedural Sky supports new lightning system since update 2.1. The example of using a lightning system is presented in the demo map Demo/Maps/AnimeLightningMap.
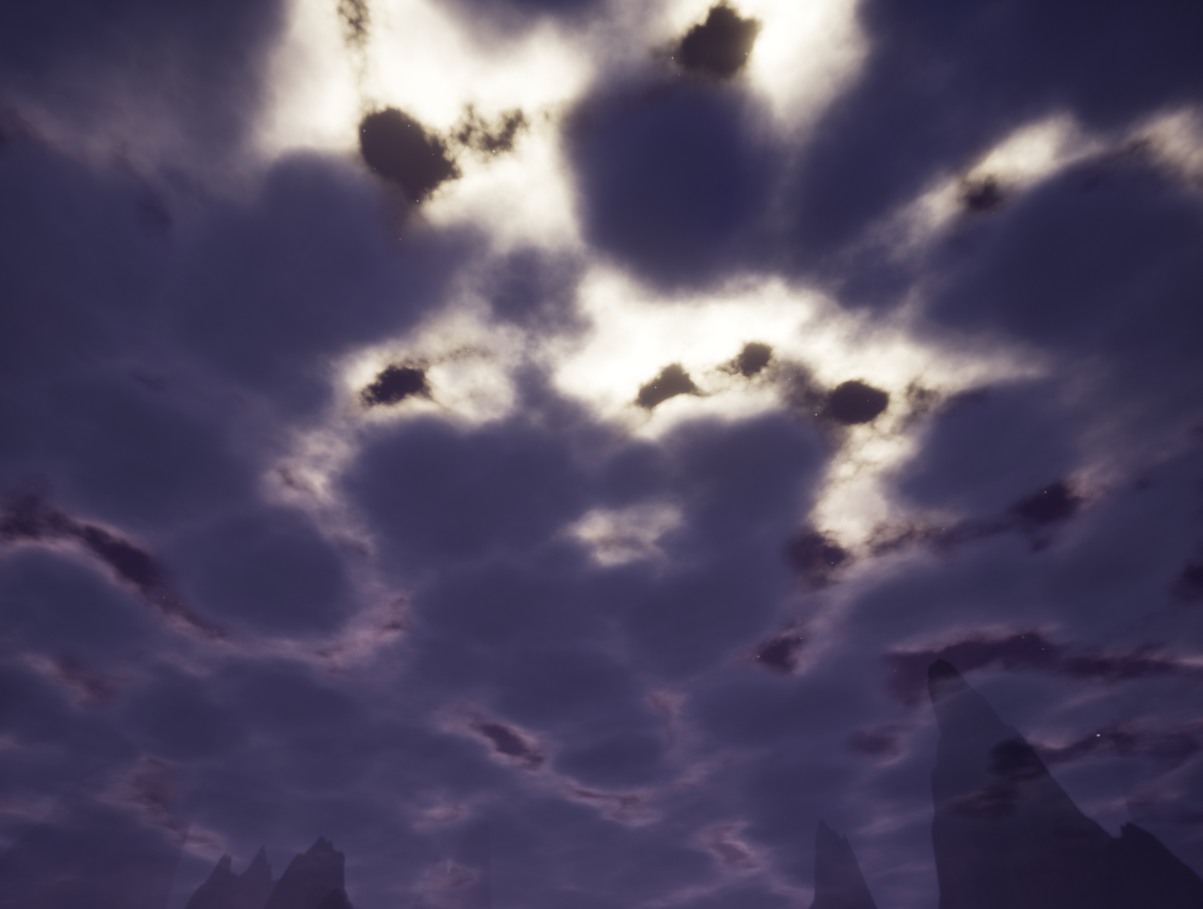
Basically, the BP_LightningController actor is responsible for controlling attributes like lightning source location/rotation/area/frequency and update of sky settings.
Step by step explained how to use BP_LightningController:
- Place BP_LightningController on your map.
- Setup the location of the actor to location above the scene (X=0.000000,Y=0.000000,Z=50000.000000). The volume of the actor presents the area of the lightning effect.
- Change the External Parameter Sky to BP_FastStylizedProceduralSky actor from your map.
- Select BP_FastStylizedProceduralSky to find Sky Material and open. Switch the UseLightning value in the material to true.
- Run the game I watch the lighting effect.
Lightning Activation
The BP_LightningController is automatically active on the map but can be activated by events as well. Set the activation loops value to 0 to control the activation by yourself. Then use Activate and deactivate events in your game to run the effect during the storm.

Lightning Fast
Lightning Fast is powerful combination materials and blueprints that implement a wide range of realistic and stylized electricity effects this external package can be easily integrated with Fast Stylized Procedural Sky.
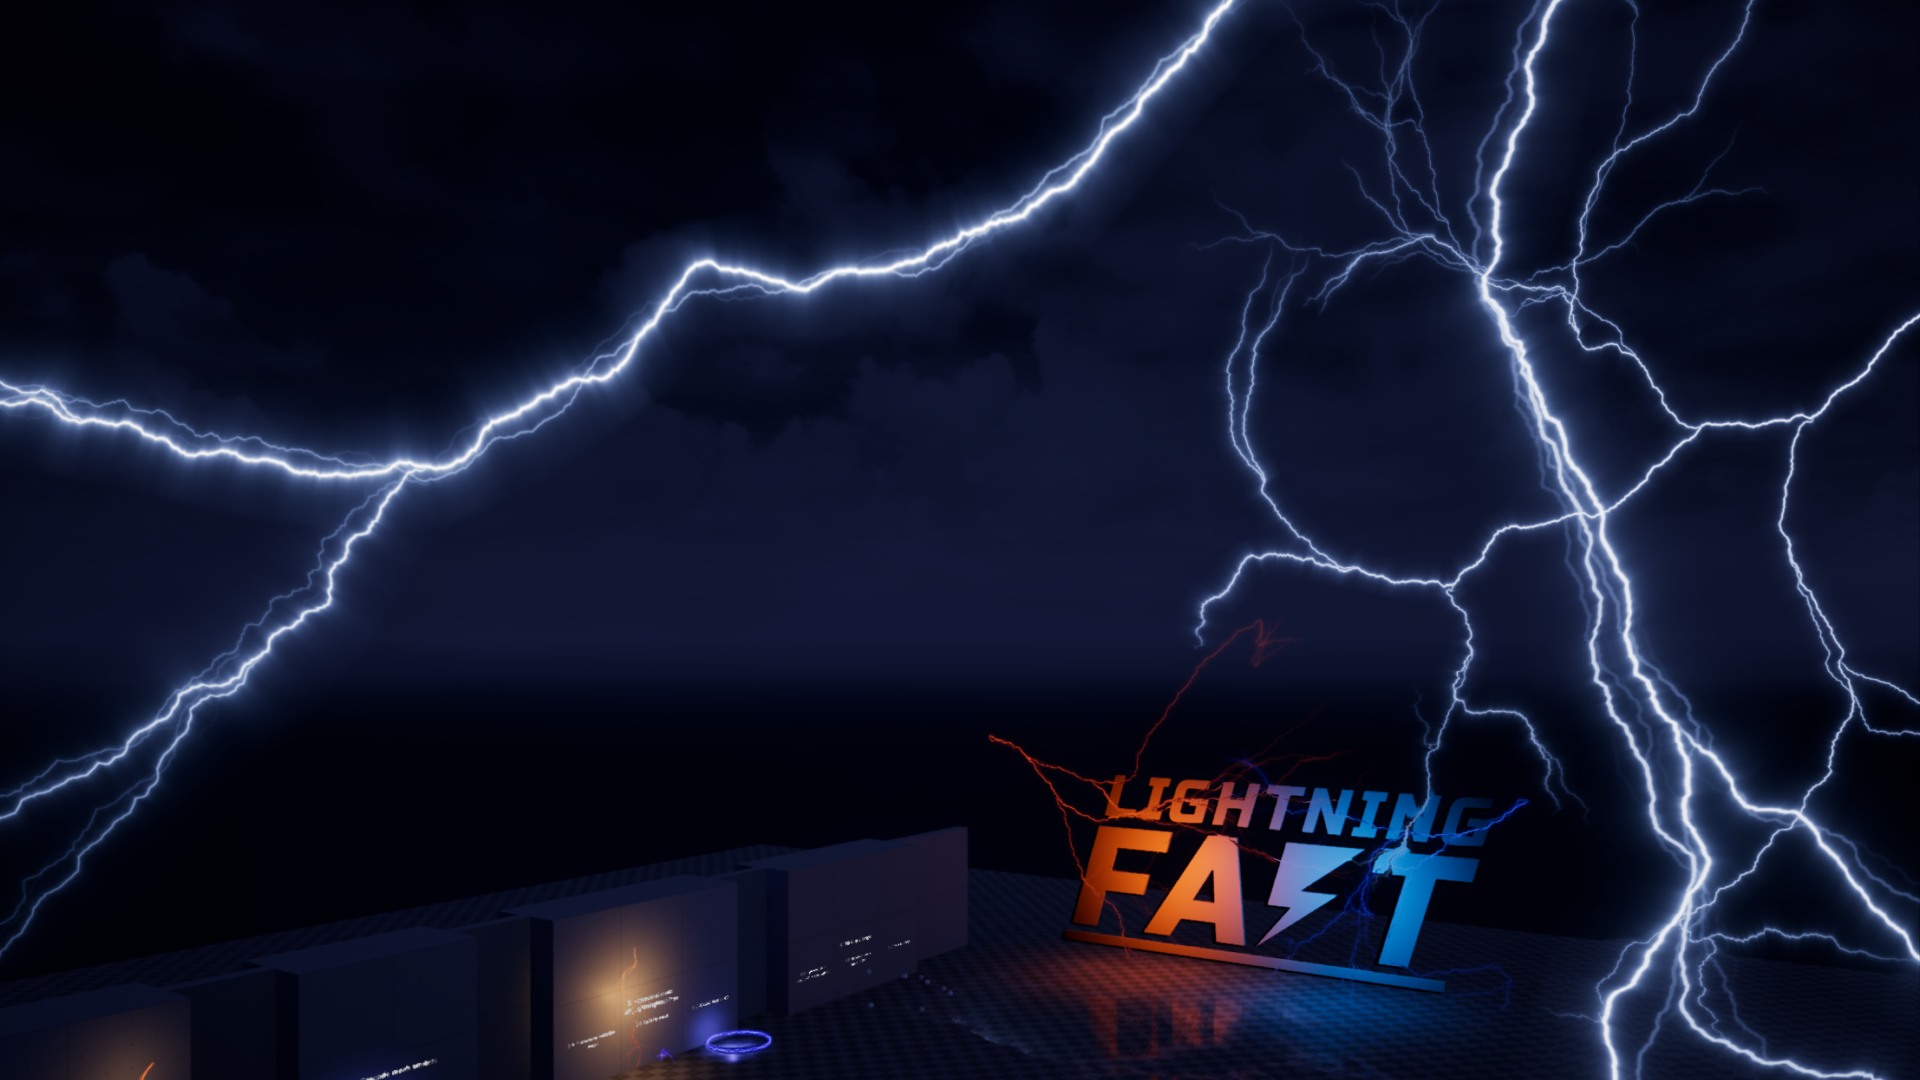
Only a few steps are needed to integrate Lightning Controller with lightning Bolt from Lightning Fast:
- Drag and drop LightningFast/Blueprints/BP_LightningBolt blueprint n the scene where Lightning Controller works.
- Scale the lightning bolt actor to be visible from a large distance: Try to use Scale (50,50,50)
- Set Activation Loops in Lightning Bolt blueprint to 0. It will disable auto-activation and allow you to control the lighting effect using a controller.
- Implement your lightning effect trigger by binding to OnActivated delegate from Lightning Controller.
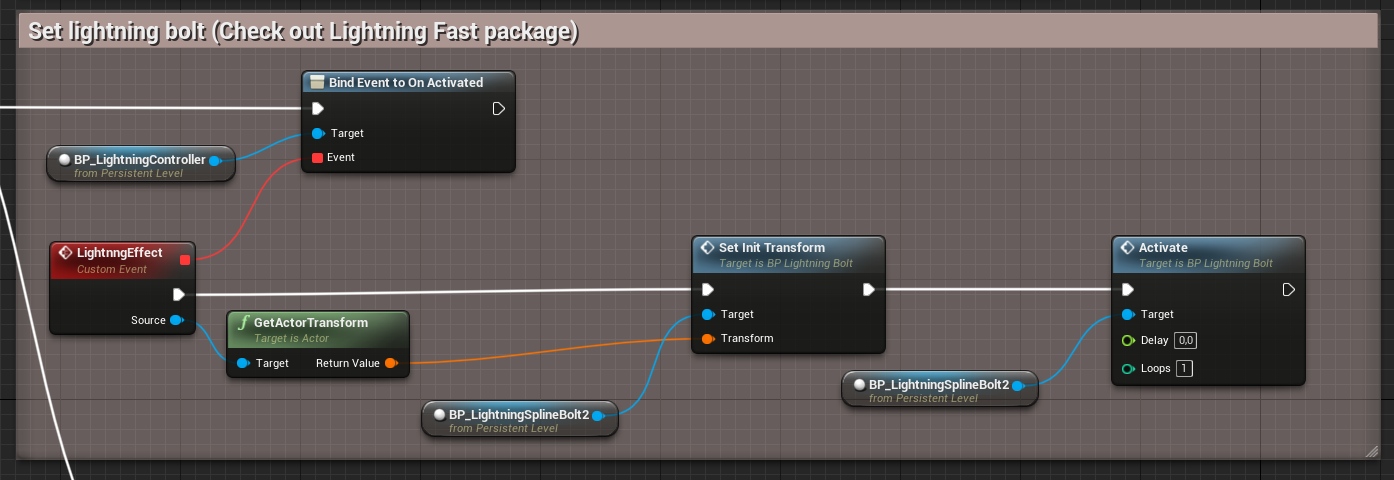
After these few steps lightning bolt effect will be shown at location and rotation randomized in Lightning Controller just after the lightning activation.
Lightning Fast use case is just an example, you can play sound or even spawn other effects/particles using activation event.
Skylight update
The Skylight actor captures the distant parts of the scene and using result data to compute lighting. This actor can be very well integrated with Fast Stylized Procedural Sky. There are two methods to update the sky during changing the weather and time:
| Method | Settings | Effect |
| Dynamic | Skylight.SourceType = SLS_Capure_Scene | The system captures the scene lighting every few seconds depending on the time change and preset change. Try to avoid this method because it is very slow |
| Precaptured | Skylight.SourceType = SLS_Specified_Cubemap | Uses precalculated static cubemaps that will be interpolated during the time change. |
Fast Stylized Procedural Sky allows configuring skylight update to minimalize the costs.
| Skylight parameters | |
| Sky Light | External skylight scene actor used for global lighting on the scene. System recapture during the update. The frequency of recapture can be changed by. |
| Sky Light Recapture Delay | The time between updates of the skylight. A bigger value makes that system run faster but the frame rate will jiggle every time the update is evaluated. |
| Sky Light Static Cubemaps |
List of cube maps used as precalculated (fast) skylight blended in time. The time between midnight to midday is divided into a number of cubempas on this list. The first cubemap corresponds to midnight and the last cubemap is midday. |
| Sky Light Cubemaps Time Driven | If true use time of day to select cubemaps. When false uses the height o the sun to select cubemap. |
Using sky spheres
Fast Stylized Procedural Sky supports rendering on skydome as well as sky sphere. Skydome is set as the default option. It is required to do a few important steps to switch sky into Skysphere mode:
- Switch material to sky sphere UV: Open SkyData/IM_DefaultSky and change UseSkydomeUV = False.
- Set the sky sphere mesh in the blueprint:
Open BP_FastStylizedProceduralSky and find SkyMesh component.
Change StaticMesh=SM_Skysphere or SM_SkysphereFlat (Flat is deformed but looks better with height fog). - Change world layer texture used on the sky to the sky sphere:
Select BP_FastStylizedProceduralSky
Change WorldLayerTexture=T_SkysphereMoon
Additional material effects
There are few features in Fast Stylized Procedural Sky that are disabled in default material. It is because not all users need these advanced options and hitches on efficiency are not good enough to enable all of them by default.
To change these parameters you can create your own instance of sky material from M_BaseSky as well as modify SkyData/IM_DefaultSky. Reference to sky material instance can be set in sky blueprint parameter: External->SkydomeMaterial.
| Switch Parameters | |
| Flare Experimental | Enable experimental flare effect (about 20 additional instructions in the shader). |
| Use Clouds Texture1 | Force sky to use only one texture of clouds during sampling. Good for mobile because you will get one free sampler after enabling this option. |
| Use Skydome UV | Use this option to switch mapping to skysphere mode (false). (Read how to using sky spheres in paragraph 4) |
| Use Star Scintillation | Enable stars blinking in the sky. |
| Use Sun Eclipse | Sun can be covered by the moon when this option is enabled. |
| Use World Layer | Optimization. Whether world layer texture should be used on the sky. (optimization). |
| Use WorldSpace Rotation | Optimization that forces shader to use world space rotation of sky mesh in calculations of sun/moon and clouds. |
| Use Clouds Bloom | Fake bloom effect on clouds. Useful for mobile. |
| Use Multilayered Clouds | Activate the second layer of clouds. It’s very expensive (over 50 additional instructions). |
Moon movement
Shading of the Moon is always calculated based on the position relative to the Sun it is hard to set up at first but results are very realistic. This is automatic so there is no need to care about the direction of shading on the Moon. There are a few important parameters that allow setting the moon movement:
| Moon movement | |
| Moon Change Speed | Rotator that describes how many degrees the moon should move during one day. A realistic model should be about 13 degrees per day. |
| Moon Synced To Sun | Force synchronization between the Moon and the Sun. In realistic mode, it should be checked as true. |
| Moon Rotation | The start position of the Moon in the sky should be set at midnight. |
Questions & Answers
How to switch on/off the background mountains
This feature can be disabled for optimization so you will have to switch it in the material instance used by the sky.
- Select the Sky blueprint on the map
- Find Sky Material used by blueprint open.
- Switch UseWorldLayer=true/false.
I Have a question …
Cool! You can always ask! I’m ready to support and add some new useful features to my product. Feel free to comment and rate my package too 🙂
Can I use skysphere instead of skydome?
Skysphere is supported by sky but you need do some simple steps to start using this feature. Check “Using skyspheres” in the documentation.
Is there any support for stars blinking?
Open the material instance that you use in the sky (by default M_DefaultSky) and change flag:
Use Stars Scintillation = True
This option is activated by static switch because costs additional calculations on material that some users don’t need and the author is not satisfied with final effect so the feature is still under development.
Why the sky appears locked-in-place even though the the rotation of blueprint has changed?
The sky is calculated in world space for optimization but this is optional and can be changed.
MI_DefaultSky->UseWorldSpaceRotation = false (fixes material rotation)
BP_Sky->UseWorldSpaceRotation = false (fixes rotation of clouds shadow mapped on ground)
About 10 shader instructions lost on this operation. Use this options only when you need.
Why there are two materials of sky instance after update?
I've changed the name of "M_DefaultSky" into "MI_Default" to stay consistent with Assets Naming Convention - Epic. M_DefaultSky Should not exist in the project anymore.
I've started to use parameters collections in the new version and old parameters are not updated anymore that is why the old material is incorrect. Best way to fix this is to remove the package from the project and download the current version of the FSPS again.
If you created any presets or day-night curves you should copy them before this operation and paste into your project. It should work fine.
Why my scene is black on mobile?
Probably you have used clouds shadow material on your blueprint. This functionality is not supported by UE4 mobile rendering. There is no function to check platform specific settings in UE4 to automatic disable this feature so it needs to be disabled manually. If you are working on mobile just clear ground shadow material.
How to achieve more realistitc effect?
The sky system is non-realistic/nonphysical based but there is a lot of options to tweak the results to make it look reliable.
Can I fly throw clouds? Is it volumetric ?
Nope. The material is not based on volumetric principles, the rendered sky is flat with the illusion of depth based on shading so the best results you will get from the ground.
Shadow Warrior is a bold reimagining of the classic 3D Realms’ shooter from independent developer Flying Wild Hog starring the legendary and quick-witted warrior Lo Wang.
LITRON is the retro-style puzzle game that puts the player’s wit and reflexes to the test of the decade. Inspired by all-time classics like Snake and Tron, brings 60 twisted and mind-boggling levels created in the timeless visual style.
Godfire™: Rise of Prometheus is an action-adventure title unlike any other for mobile devices, that puts the players in the armor of Prometheus – a titan that defies the gods and embarks on an epic quest to save mankind.
Real Boxing™ brings you the most exhilarating, no holds barred fighting ever seen. Featuring ultra-realistic motion capture from real boxers plus amazing graphics from the powerful Unreal Engine, you’ll feel every hook, jab, and uppercut.


