
Introduction
- Category: Blueprints
- Update: 1.3 (06-08-2018)
- Unreal Engine: 4.18 - 4.19
- Platforms: VR, PC, Console
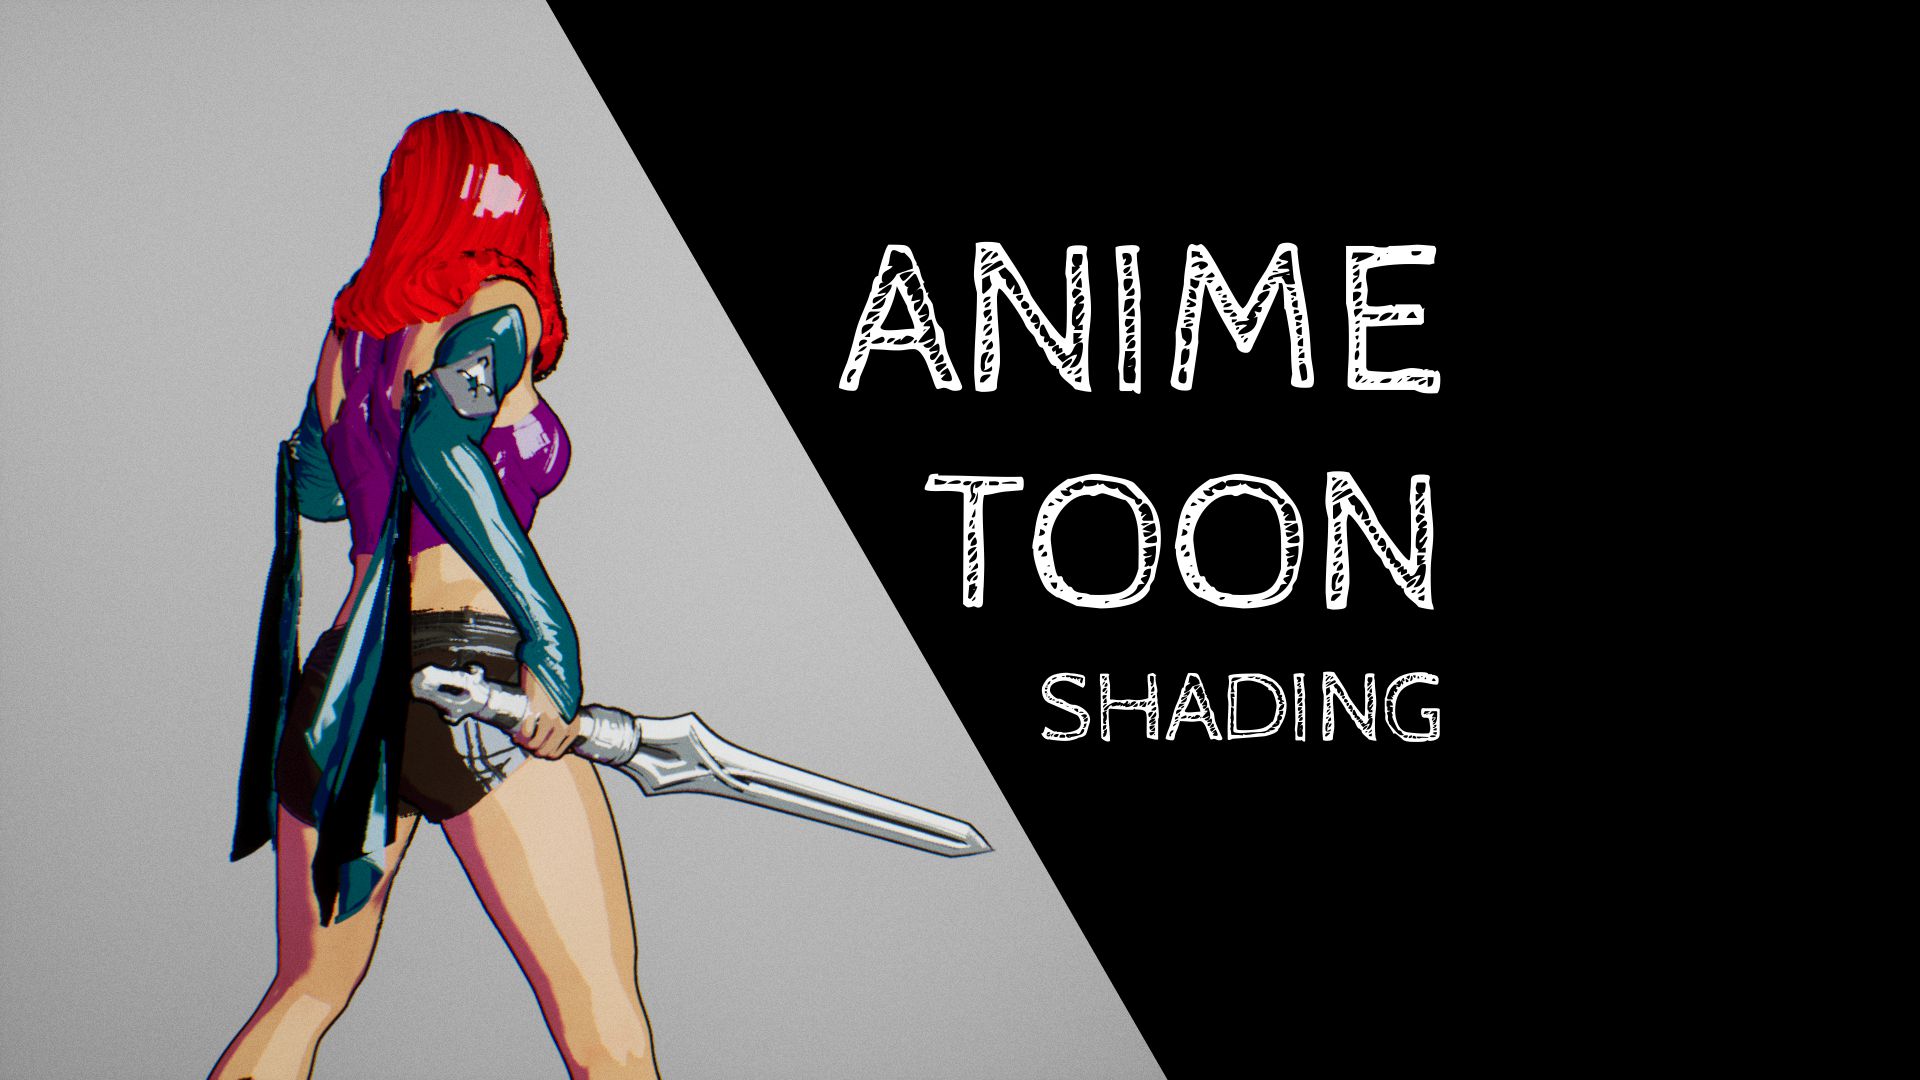
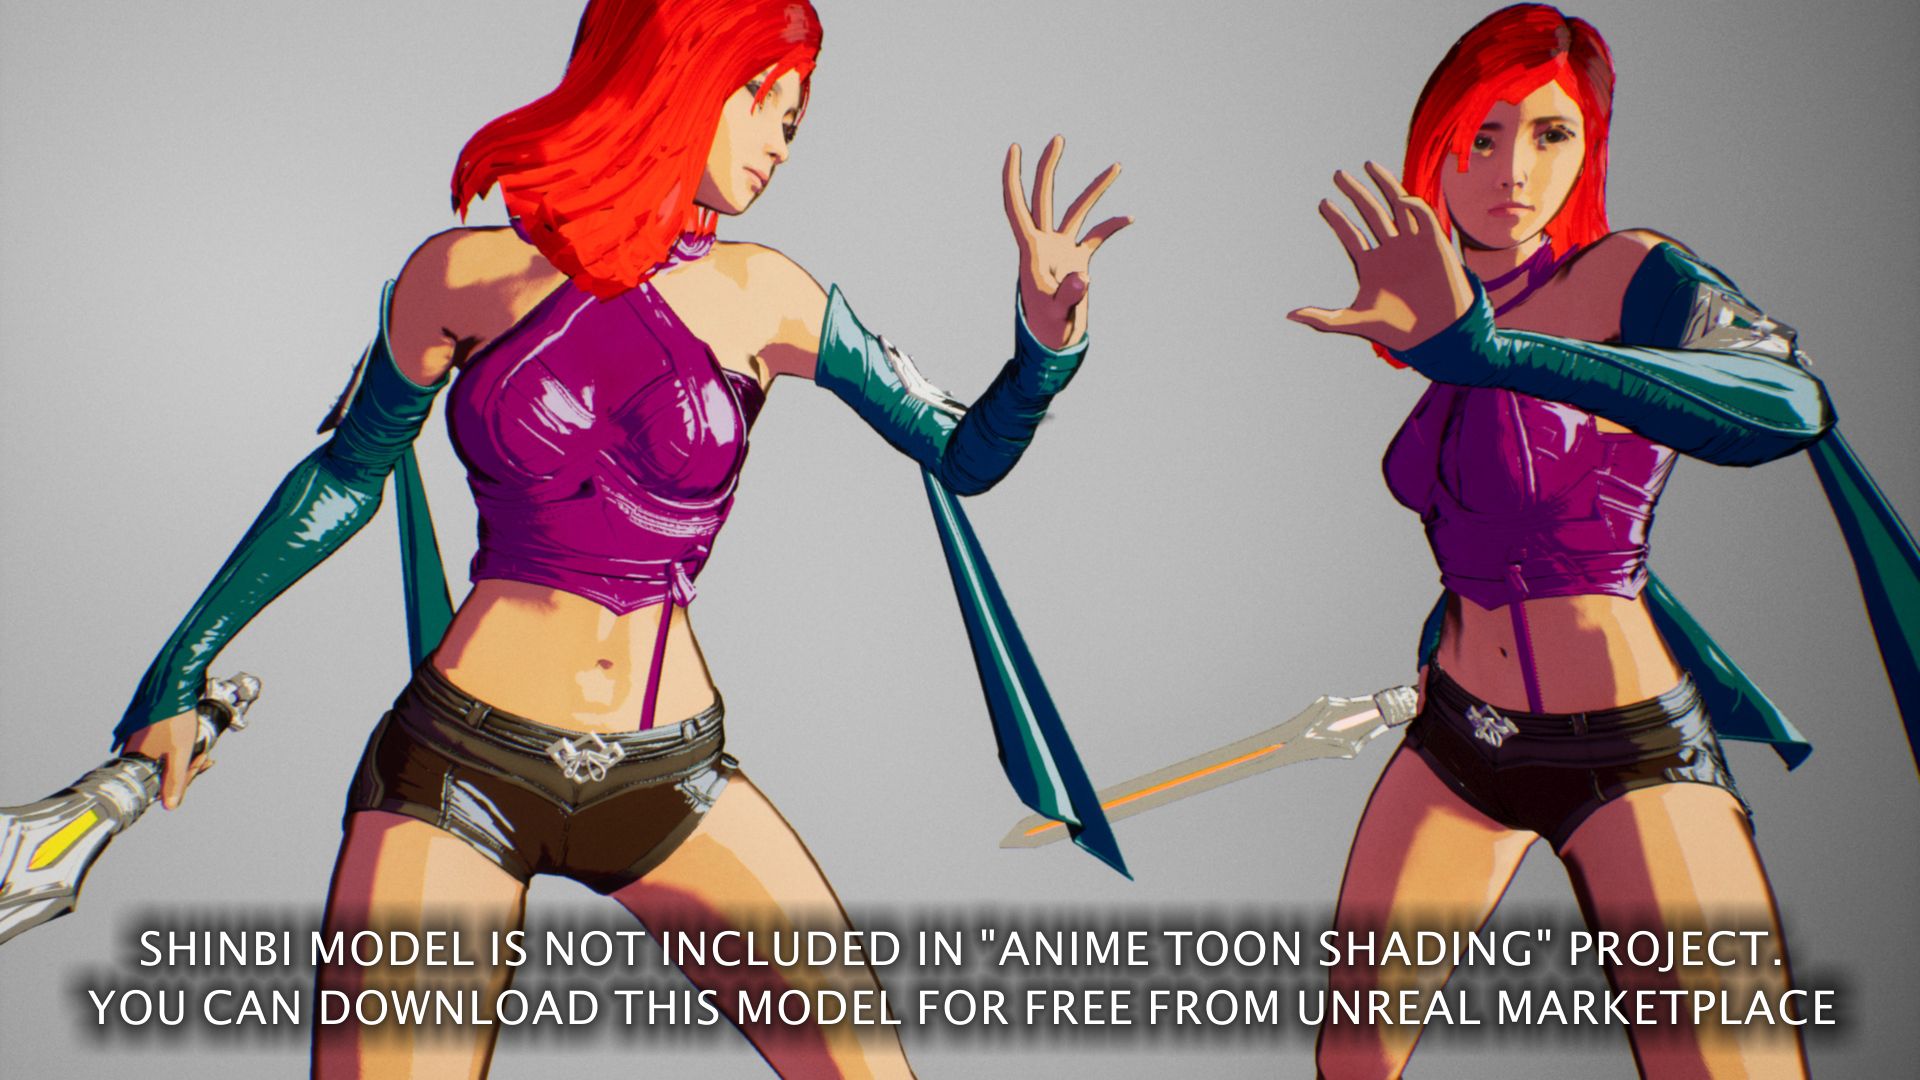
Main references to create Anime Toon Shading was “Gravity Rush” and “Dragon Ball FighterZ” so if you want to achieve this kind of feeling with dynamic cartoon lighting in your game, then this package will be a perfect starter for you.
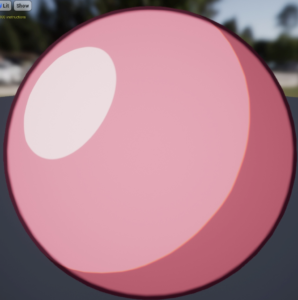
Anime Toon Shading is a post-process independent approach to cartoon style effect, which means it uses geometry based shading model that allows customizing every character on the scene to specific lighting conditions and works perfectly in the forward rendering mode.
Package contains a full lighting system that supports single dynamic directional light and multiple dynamic point lights. Perfect choice for VR games as well as mobile.
Features
- Advanced material configuration instanced per object specular/shading/outline
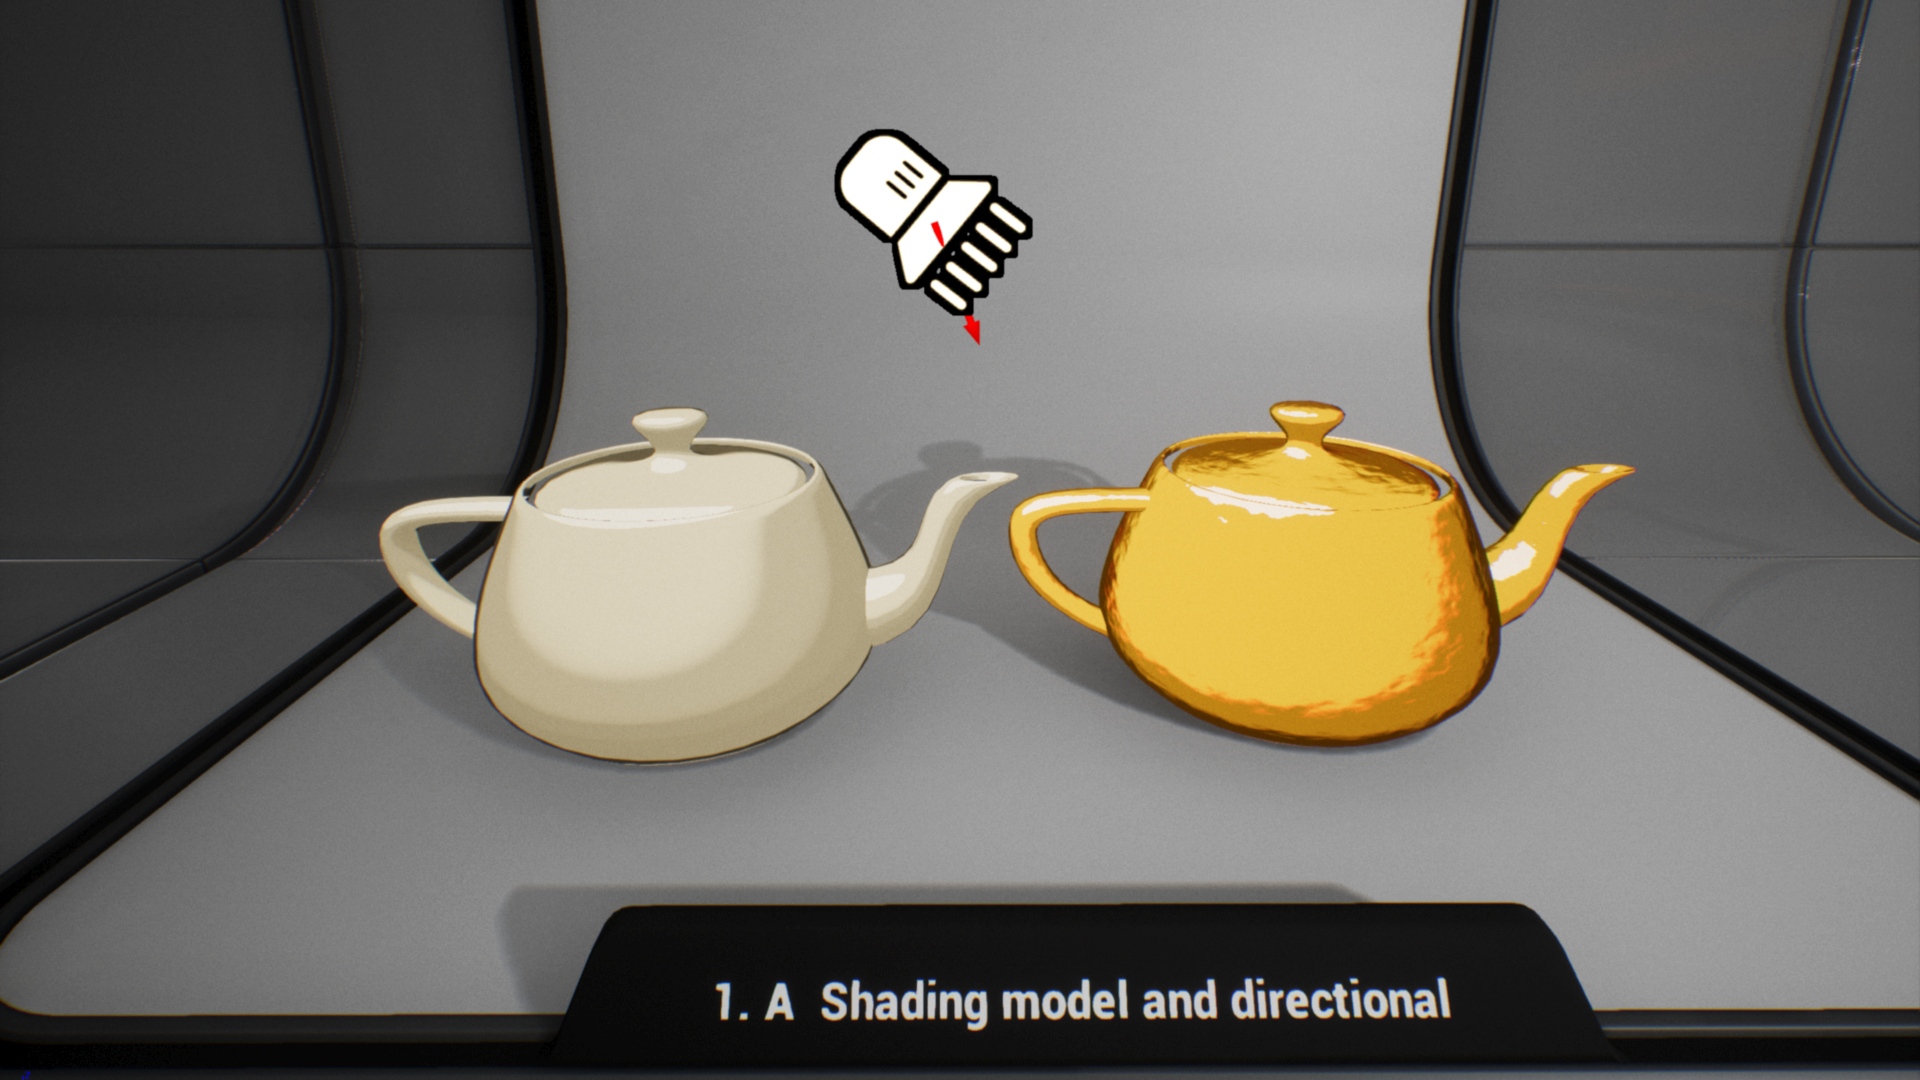
- Dynamic directional light support
Multiple dynamic point lights that can affect actors - Very fast and GPU friendly
- Material function, which can be used as an unlit/lit material
- Tested on meshes from paragon (great for stylizing assets)
- Geometry based shading. No need to use post-process uses, forward rendering mode works in VR and mobile.
- Interface for an easily combined dynamic toon lighting system with any actor
- Outline shell mesh (material for additional mesh rendered from inside)
- Multiple parameters designed with thinking of customizing toon shading on characters
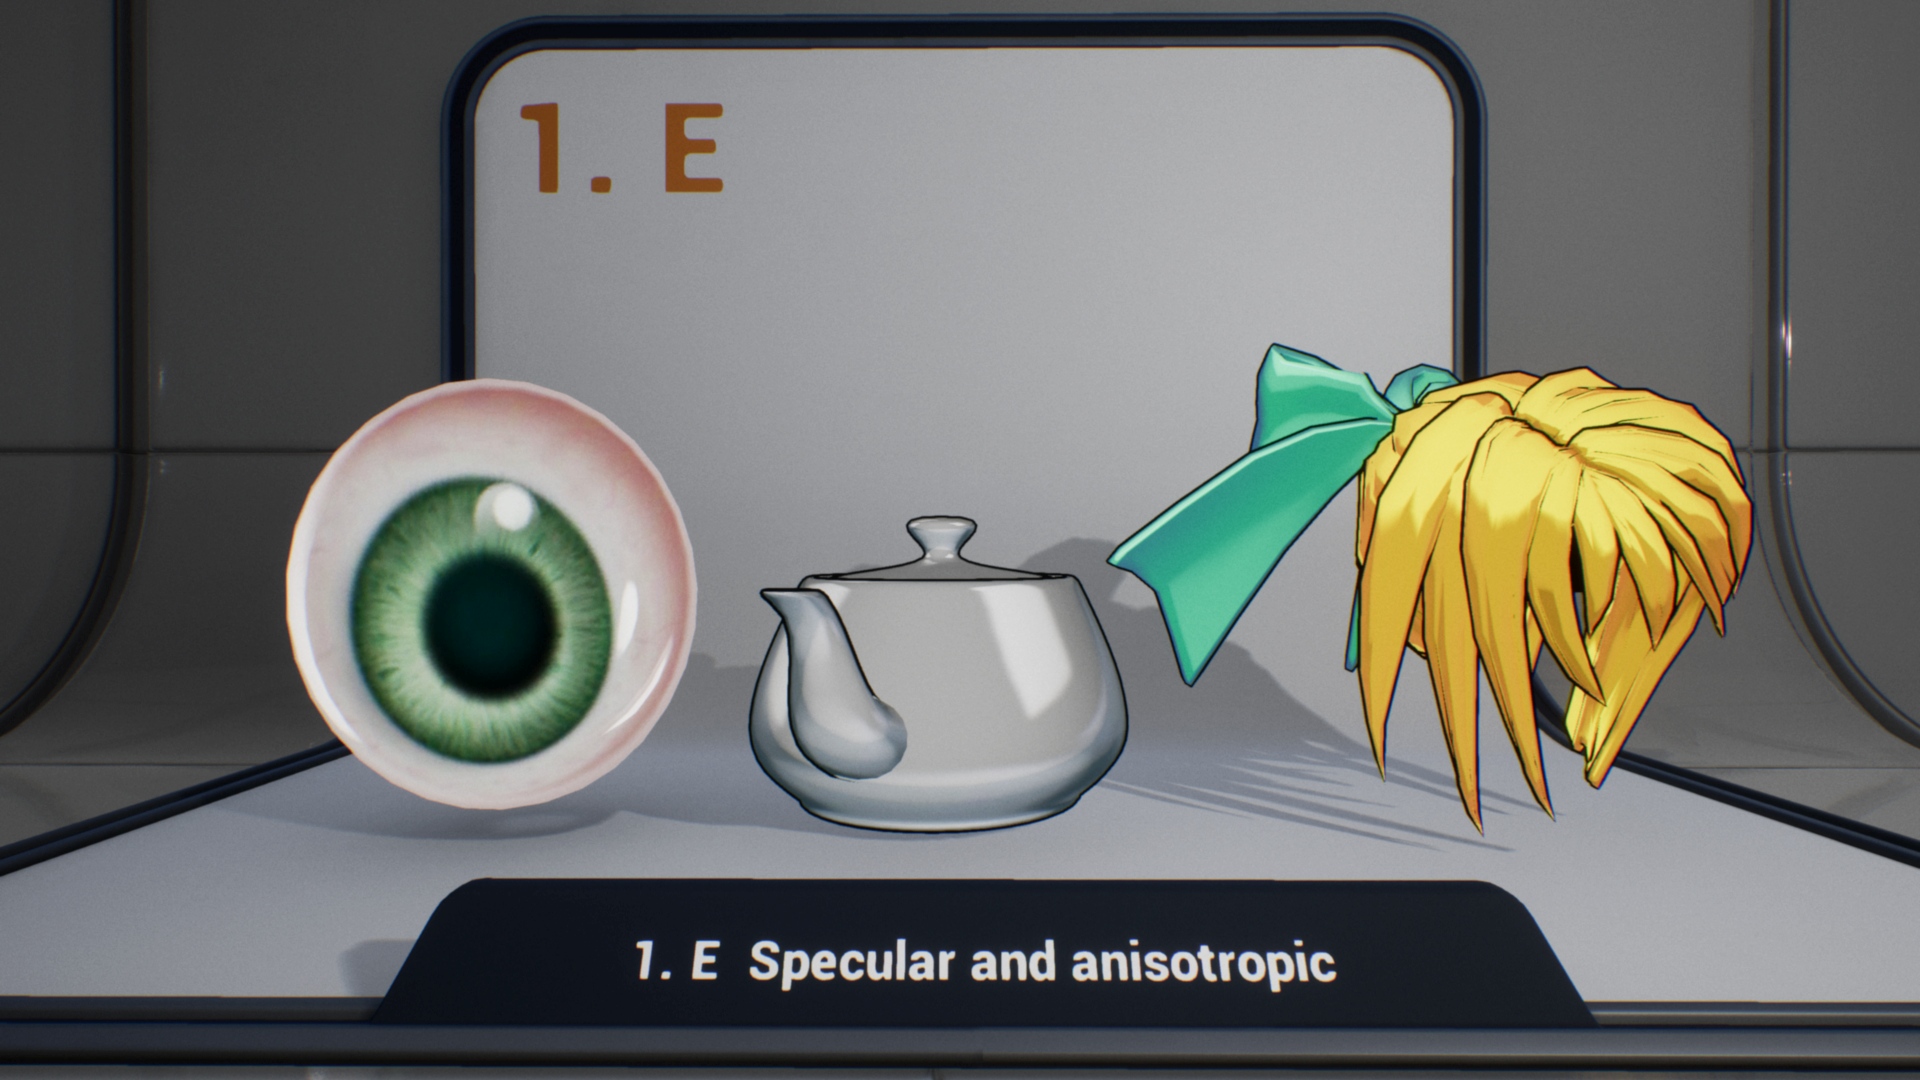
- Anisotropic specular (hairs), specular matcaps support (Eyes, Metal)
- Easy to integrate with external post-process.
- Toon specular parameters: Specular size, color, and translucent, softness
- Toon shadow parameters: Glossy effect
- Aberration effect, softness, width, two shading methods (texture and smoothstep function), multiple shading textures
- Toon outline parameters: width, softness, color, and translucency
Gallery

Release changelog
Version 1.3 (06.08.2018)
- Translucent and mask
- Two-dimensional gradients
- Gradient texture generator
Version 1.2 (12-06-2018)
- Light receiver positioning (4 modes available in ToonComponent - mesh/actor/bounds/toon)
- Added anisotropic specular (hairs)
- Added matcaps support (Eyes, Metal)
- Updated dynamic lighting combine function/transition
- Added material function for masking "Anime Toon Shading" in post process "MF_ToonShadingPostprocessMask"
- UseDynamicLighting flag (faster rendering of objects that uses only the direction of light)
- Example map updated
Version 1.1 (20-05-2018)
- Bugfixing and optimizations
- Example map updated
Version 1.0 (09-05-2018)
- The first version of the package released.
Documentation
Geometry based shading
There are two types of packages on the marketplace that supports toon/cel-shading in UE4. Post-process based (other packages) and Geometry based (this package). Both have cons and pros and It is important to understand the difference to know with them chose. A table below shows basic differences and possibilities that will be supported or blocked depending on what you choose.
|
Post-process based toon shading (Other packages*) |
Geometry based toon shading (This package) |
|
|
Description |
uses the final image generated by ue4 to translate scene colors on cartoon stylized images. |
uses the material system and meshes and is applied per object. |
|
Platforms |
PC (full post-process in forward rendered scenes is problematic) |
All platforms VR/PC/Mobile. Just works, this is the old-school method. |
|
Scene |
Full scene effect in one click. |
Need to be applied per object/per material. |
|
Usability |
Easy to use just plug and play. |
A lot of work to configure materials. Little complicated, need a setup for meshes. |
|
Tweaking per object |
Hard to customize shader per character. Tweaking parameters for one mesh can destroy the effect on others. |
Very functional and useful in setting up character shading. Easy to customize. Just open material and modify shading/ outline/colors/specular. |
|
Environment |
Easy to change the visual effect of the environment on the full scene. |
Global tweaking can be done by using shared material instances by multiple materials. |
|
Receiving shadows |
Supported by default. |
Not supported. |
|
Dynamic lighting |
Supported UE4 lights. It looks strange when you use more lights than 1 light. |
Implemented an independent dynamic lighting model. |
|
Emissive |
Not supported |
Supported by default. |
|
Fog effects |
Not supported |
Supported by default. |
|
Specular |
Not supported |
Supported by default. |
|
Outline |
Full scene |
Applied per model as shell mesh. |
|
Translucent |
Not supported |
Supported by default. |
|
Reflections |
Not supported |
It looks properly in reflections. |
|
Fog |
Not supported |
Supported by default. |
|
Receiving shadows |
Supported by default. |
Supported only partially by Lit material in forward rendering mode of older engine version. |
Probably there will be support for the post-process shading model in future versions of this package but in the current state, I’m focused on geometry-based shading.
Get started with material
 This part of the documentation covers the basics of creating material in Anime Toon Shading. The system is divided into two types of material that can be used on geometry lit and unlit. Both types of material support similar functionalities and parameters but there is a small difference:
- Unlit (M_ToonShadingUnlit) – Very fast but can’t receive shadows.
- Lit (M_ToonShadingLit) Little slower but allow to receive shadows.
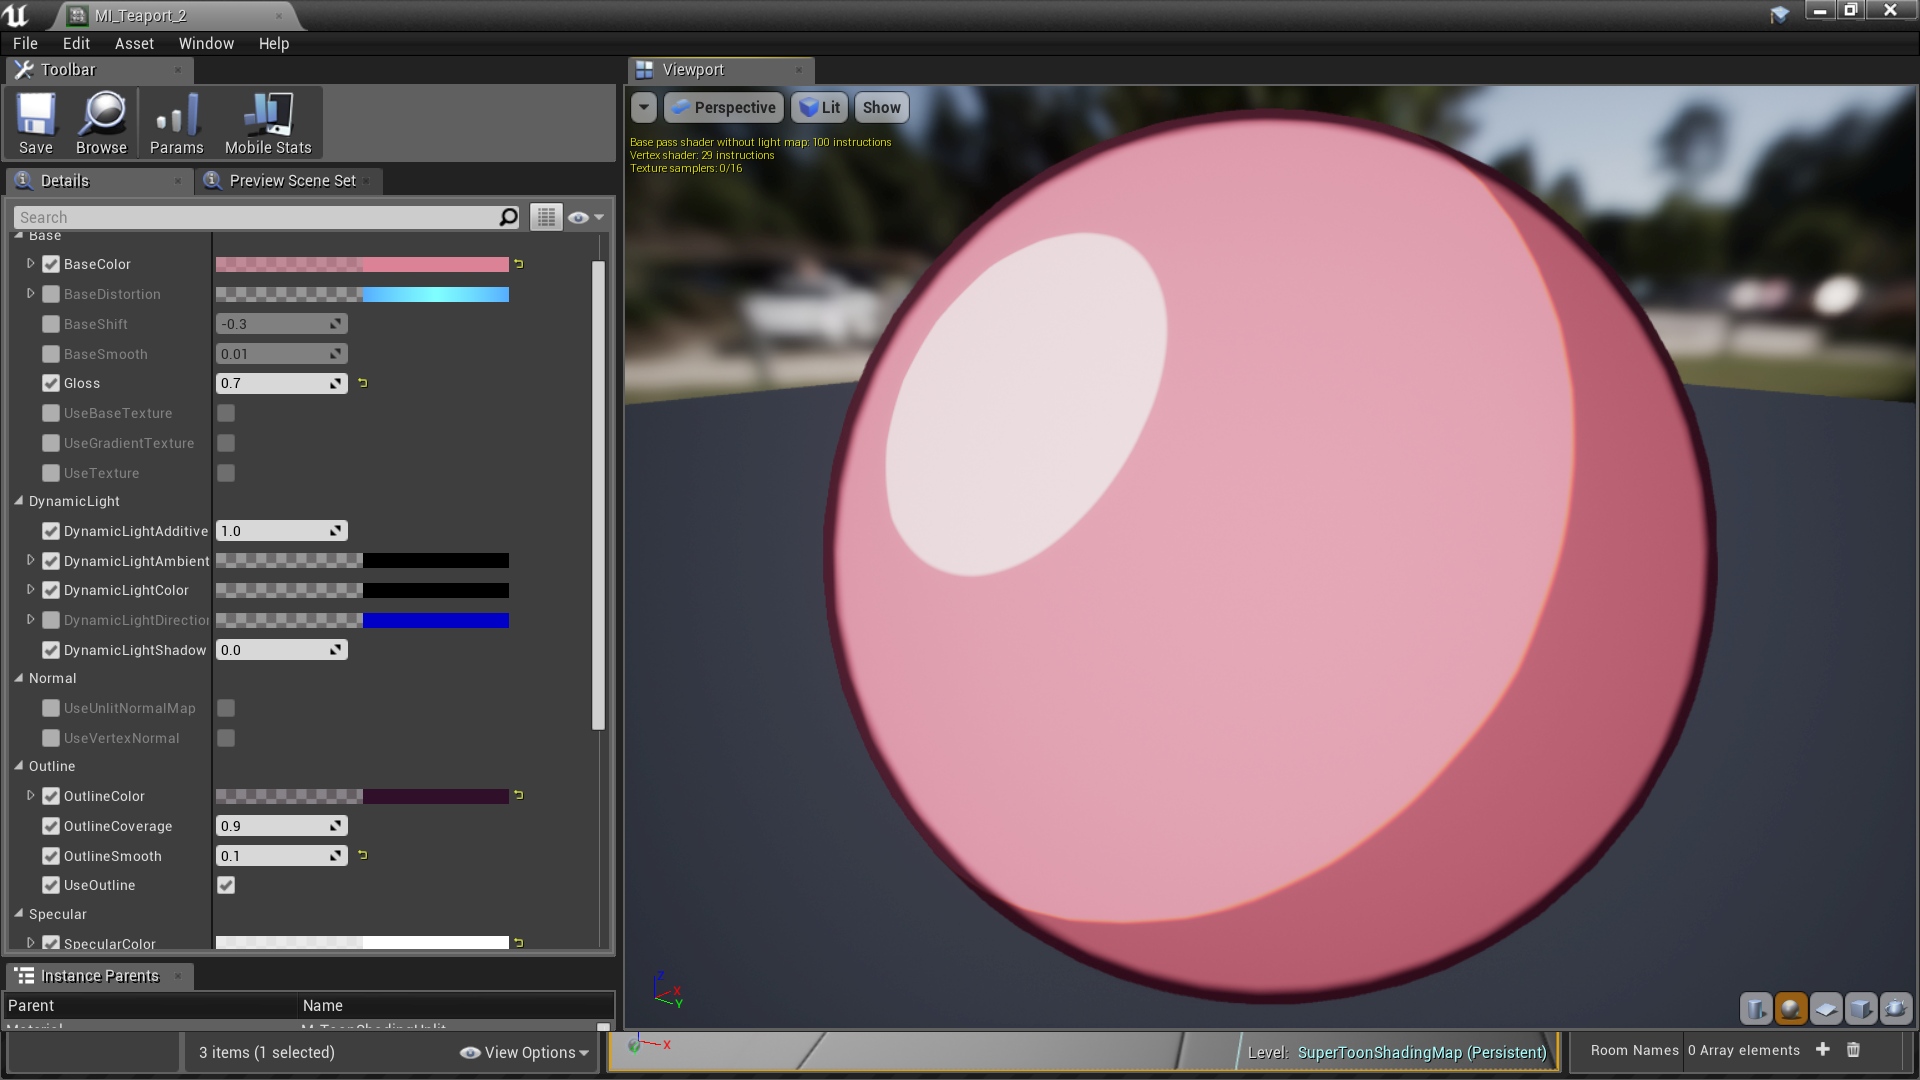
To start working with Anime Toon Shading you need to create material for your mesh:
- Chose the material type that will be used on mesh for example M_ToonShadingLit.
- Click right and select “create new material instance”.
- Open material and set up parameters of new material as you like to see an object on the scene.
- Apply created material to your mesh.
|
M_ToonShadingLit |
|
|---|---|
|
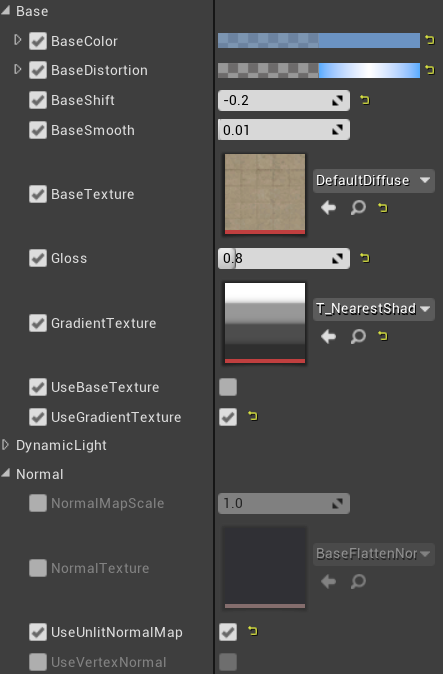
Base Distortion |
Distortion of shadow on all RGB channel |
|
Base Shift |
The offset of the base shadow. |
|
Base Texture |
(UseBaseTexture) texture color multiplied by base color. |
|
Gloss |
Gloss effect. Changes the direction of the shadow to the camera. |
|
Gradient Texture |
(UseGradientTexture) Gradient texture used for shadow. Allow changing stepping mode of shading. |
|
Normal Map Scale |
Scale normal map vector. Active only in UseUlitNormalmap mode. |
|
Normal Map Texture |
The texture is used as a normal map. |
|
Outline Color |
Color of the outline. Alpha channel contains a width. |
|
Outline Coverage |
Setting a translucent outline |
|
Outline Smooth |
The smooth edge of the outline can be used as a fresnel too. |
|
Use Outline |
Enable/disable outline effect. |
|
Specular Color |
Color of specular. Alpha channel used for specular size change. |
|
Specular Smooth |
Smooth specular effect. |
|
Use Specular |
Enable/disable the specular effect. |
|
UseSpecularTexture |
Whether to use specular matcaps textures |
|
SpecularShinnenss |
Expose the specular texture color shininess. |
|
SpecularTexture |
Specify specular texture. Example matcaps can be found in matcaps folder. Matcap is a texture that is mapping on the mesh faced to the camera it is useful to initiate some metal gloss. |
|
UseSpecularLocalUV |
There are two types of specular texture UV Mapping. The local UV mapping is the specular mapping calculated in space of the camera. Non-local is world space mapping. |
Using directional light
Directional light can be used for setting up global lighting that will be affecting all objects on the scene. Just drag and drop BP_ToonDirectionalLight on scene and setup parameters.
| BP_ToonDirectionalLight | |
| Rotation | Direction of light |
| Light Color | Color of direct lighting. |
| Skylight ambient | Color of indirect lighting. |
| Tick Interval | Frequency of updating the values. If the light will be static then set it to -1. |
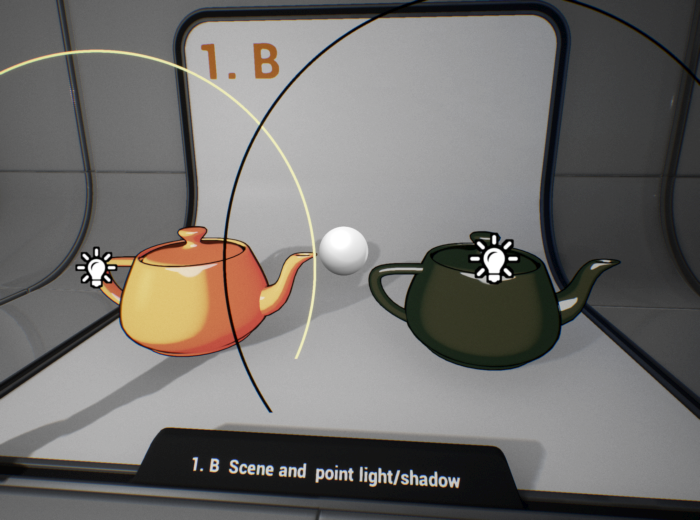
Using multiple point lights
Anime Toon Shading supports multiple point lights that are combined into second directional light data and applied to the base shading model. That functionality can be used for light flashes like explosions, some additional lighting on the scene, and shadowing in darker places where the directional light should not affect the object.
The dynamic light will only affect objects that implement properly BI_ToonShading interface. You can use an example implementation and inherit a base class of static mesh (BP_ToonStaticMesh) and skeletal mesh (BP_ToonSkeletalMesh)
- Content Browser -> Crete Actor
- Select BP_ToonStaticMesh or BP_ToonSkeletalMesh
- Setup default mesh in the blueprint.
- Set Toon Shading material on the mesh (Get Started section describes how to create new material).
- Drag and drop created actor to your level.
- Drag and drop BP_ToonPointLight to your level. Set up parameters:
BP_ToonPointLight Intensity Light color and shadow multiplier. Light Color
Color of direct lighting. Shadow Color Color of indirect lighting. Position The position of the light. Scale (radius) The radius of lighting. Base Light Weight How base directional light color affects meshes in this light. 0 means additive, 1 means override the base light. Base Shadow Weight How base directional light shadow affects meshes in this light. 0 means override the base light direction 1 for no change. Scene Will be updated automatically after adding light to the scene. - Drag and drop BP_ToonScene to your level.
- Select BP_ToonScene and add Lights and Actors that should be managed by the lighting system.
Custom character interface
Sometimes there is no possibility to inherit example actors (BP_ToonStaticMesh, BP_ToonSkeletalMesh, ThirdPersonCharacter) that contains the implementation of dynamic lighting. Fortunately “Anime Toon Shading” is very extendable, you can modify your own character to be affected by dynamic Toon Shading lighting as well. It’s a bit complicated but believe me, I did everything I could to make it user-friendly.
- Open Character blueprint. Add BP_ToonScene reference attribute to your actor. Variables->Add:
- Variable Name Scene
- Variable Type BP_ToonScene
- Add a new component BP_ToonShadingComponent that will be used to communicate with the scene.
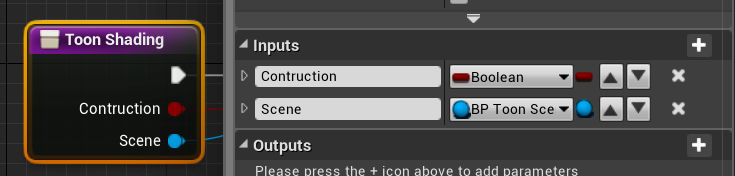
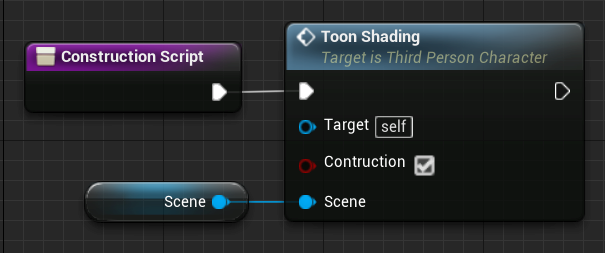
- Add a new function Toon Shading that will be evaluated to update lighting on the object. Functions->Add.
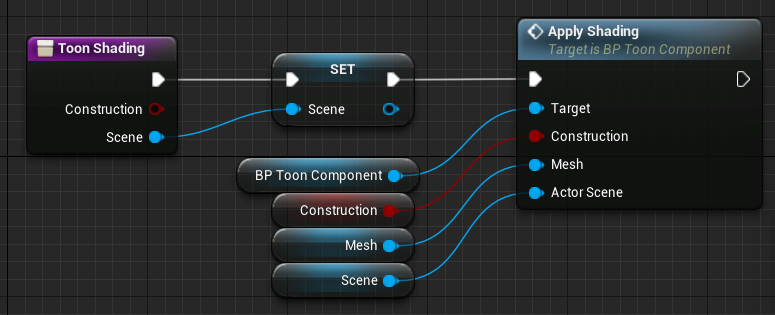
- Add ApplyShading evaluation for every mesh in pawn that should be affected by lighting. In this case, the character contains one Mesh.
- Call function in the constructor to activate lighting on start.
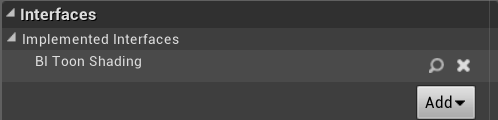
- Implement the ToonShading interface. Open Class Settings and add interface BI_Toon_Shading to list.
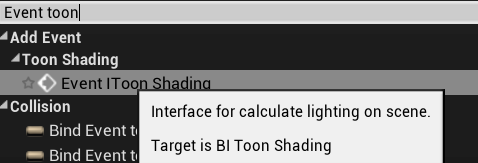
- Call toon shading update on events BeginPlay and IToonShading

Remember! This modification creates dynamic material instances to communicate with the scene manager, you should use them instead of creating a new one. Custom character interface
External post-process
It’s a good practice to combine two types of toon shading systems for example by using “Anime Toon Shading” for characters and post-process material for the environment.
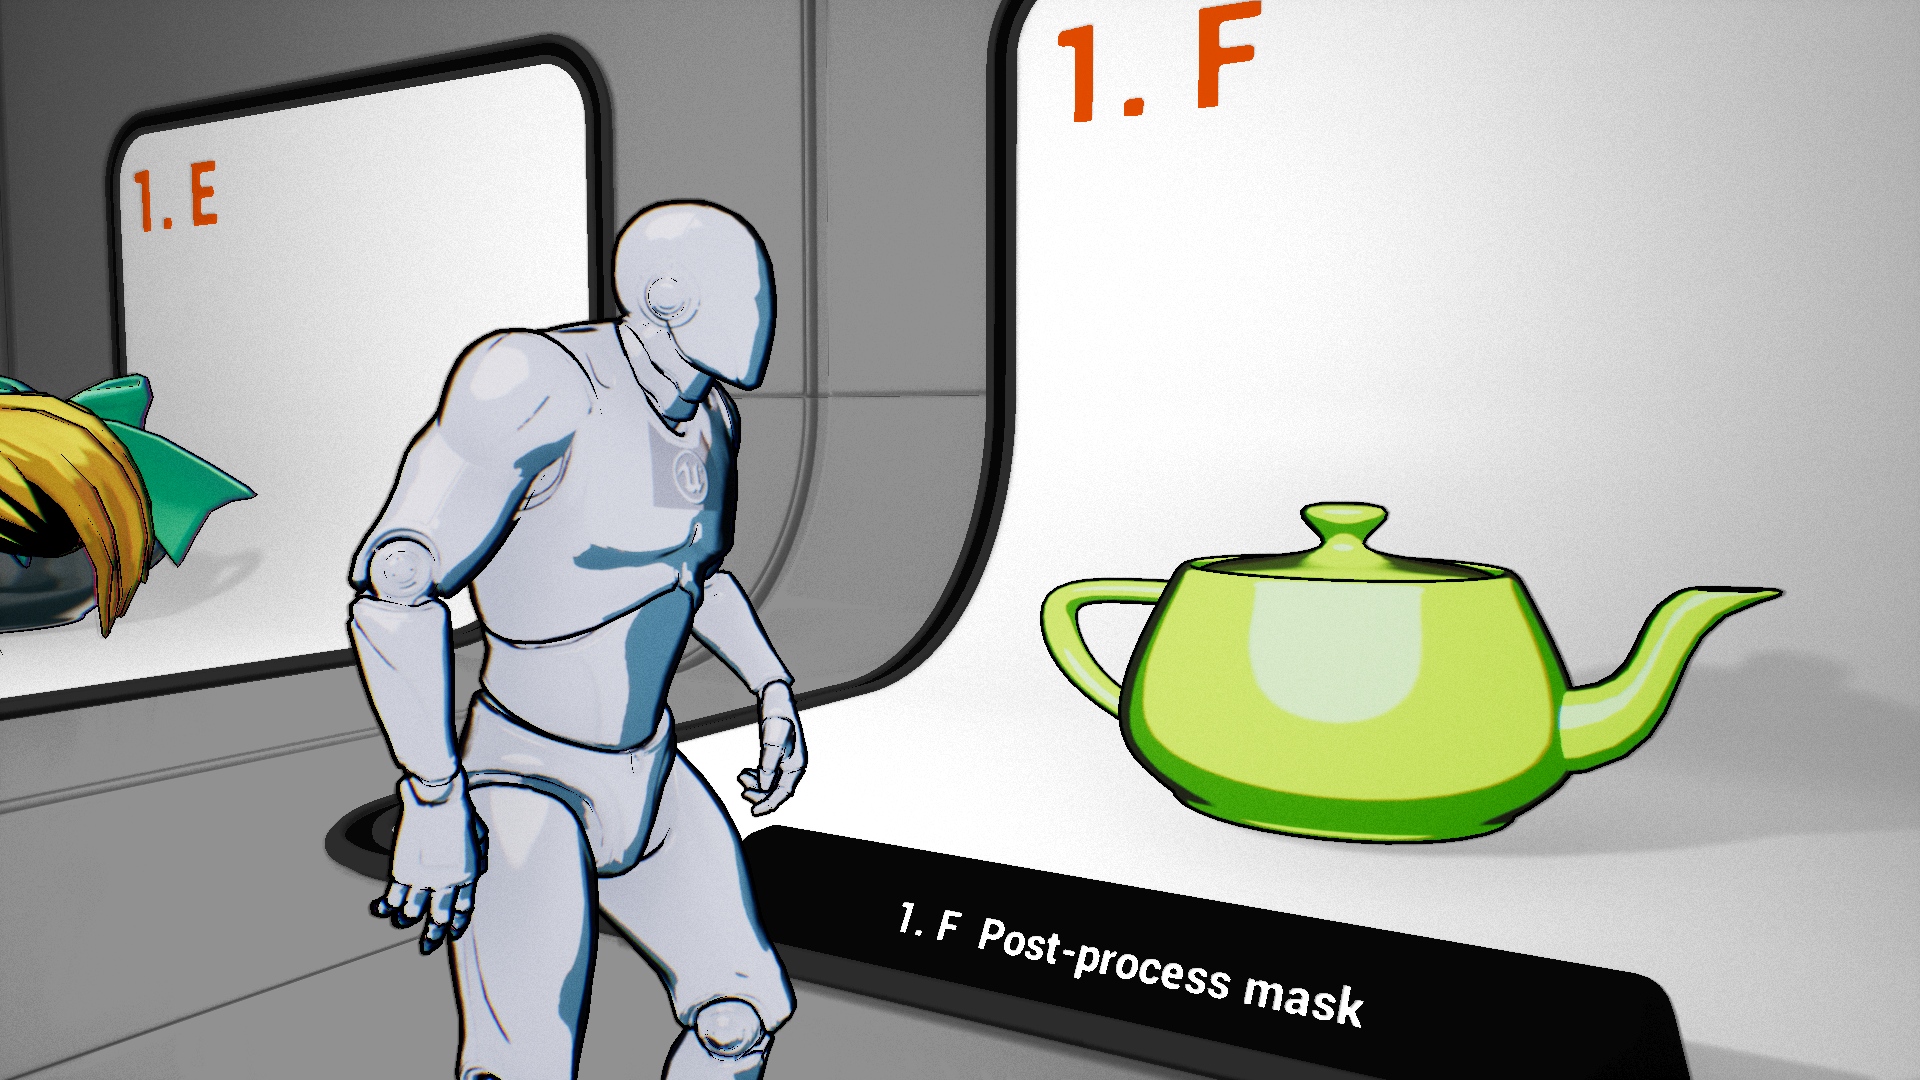
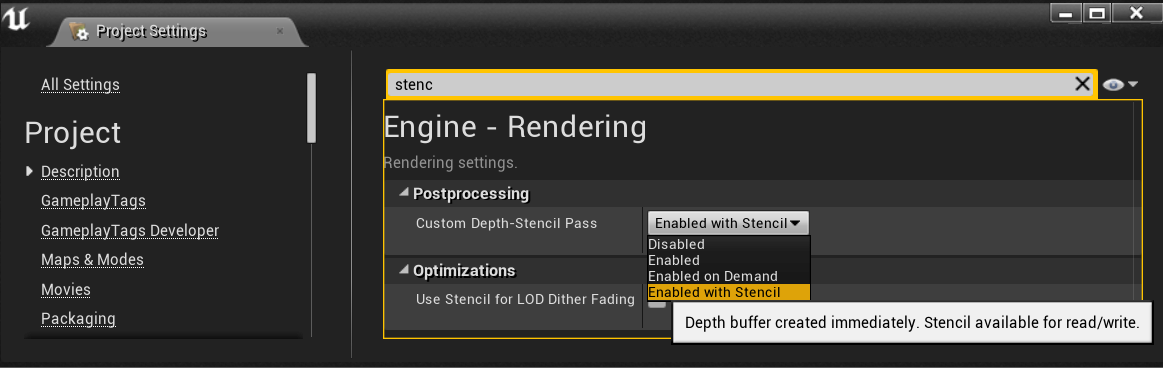
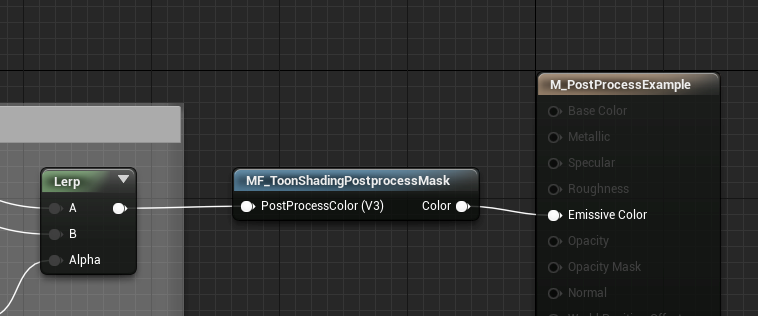
Post-process based toon shading should support excluding the shading materials that using “Anime Toon Shading”. Generally in this kind of problem full-screen mask tells the post-process shader where to live pixel is not changed. It can be implemented easily by using a custom depth stencil mask. This is a simple example of how to integrate this package with post-process material.
- Set up your project to use the stencil buffer. This functionality is required because we need an additional buffer to mark pixels rendered by AnimToonShader.
- Select mesh that is using “Anime Toon Shading” material and set stencil mask value:

Remember: It is just an example configuration of the mask. If you already using custom depth stencil for outlines then you should reserve one bit for “Anime Toon Shading” masking.
- Use MF_PostProcessMask material function as a mask on your post-process effect:
Outline shells
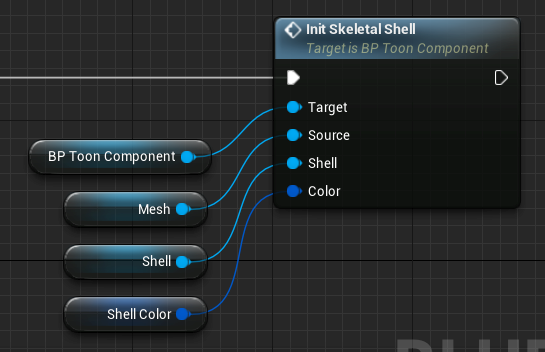
The outline effect for forward rendering can be realized by creating a second expanded mesh with front face culling (rendered from inside). “Anime Toon Shading” contains tricky material that can do it for you. You can find an example of this part of the documentation in Demo/Characters/ThirdPersonCharacter blueprint.
- Duplicate mesh component in your character and rename to ‘Shell’.
- Initialize Shell in construction script
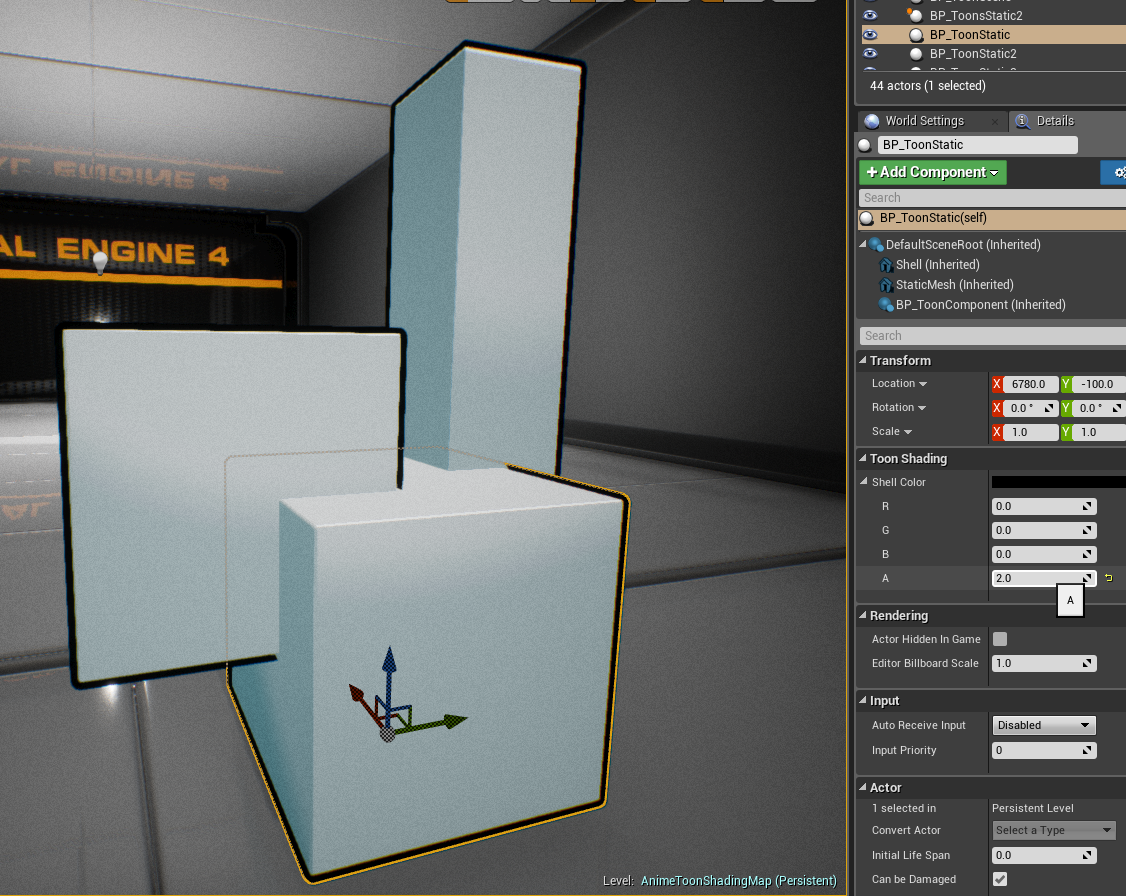
- You can add the attribute ShellColor to your blueprint or use MakeVector. The alpha value in this vector is responsible for the outline width.
- The shell material supports the vertex color alpha multiplier. You can locally control the width of the shell by painting (alpha channel) on the vertex color of the mesh. It is a cool feature used in the current generation games.
Flat surfaces
- Disable UseOutline in material
The reason is simple – it is problematic to implement a fully functional outline effect using only data in the mesh. An outline needs to be stimulated by external mechanisms. - Try to prepare meshes with rounded corners
It will make your shading look more smooth with the soft transition on the edges. - Use outline shell
A detailed description of the method can be found in the chapter “Outline shells”.
Questions & Answers
Dynamic lights? how it works in forward and deferred?
It is based on the observation that toon shading don’t need to be based on realistic lighting model. Anime Toon Shading material supports two directional lights. First one is global directional light shared by all objects on the scene. The second one is dynamic light calculated per mesh as the sum of closest point lights. The tricky part is to combine this two lights in the material to not destroy the shading on the mesh.
Does it work on mobile and VR? Forward rendering is supported?
Yes, it should work fine on this platforms. The standard unlit version of the material uses about 110 instructions (green complexity), cheapest can be lowered to 70 by setting flags useSpecular=false, useOutline=false, I don't have the mobile device to test so it'is hard to be sure but the materials are optimized for mobile.
Do the materials self-shadow?
Nope self shadowing is not available because this method uses material emissive color. However you can add dynamic light that will absorb directional lighting to simulate walking into shadow. Receiving shadows is supported only in forward rendering.
This shader works with post processing?
This implementation is geometry based. Material function can be injected in any material you want to add functionality of this shader. For full scene toon shading you should use another package.
Is it possible to do Opacity with an alpha mask with it?
Yes:)